155:A bathroom makeover on a budget.
Since I moved into this flat more than 2 years ago, the bathroom has been a constant source of disappointment to me.
(You’ll be pleased to note that I haven’t left my penchant for dramatics in 2023)

Inoffensive and functional, but dated and tired. Time for a refresh.
The previous owner had put in a lovely new kitchen and notified me that she was getting ready to do the same with the bathroom but she decided to sell instead. What remained was a windowless, melamine afflicted, carpeted disaster. And it was old.
You know as well as I do that bathrooms are expensive - and prices have only increased over the past couple of years. A whole new bathroom isn’t something I can afford just yet, but what I could do was give it a quick spruce up and make it feel a little bit lovelier to me.
As always, I started with a Pinterest board… the trouble was, I had curated a selection of at least 4 different styles that I liked. My options were:
A cool Mediterranean meets Moroccan, micro-cemented white vibe.
A modern city-style small apartment bathroom
Classic, traditional French with a modern twist
Scandi Japandi fusion with wooden panels and deep dark colours.
So because none of these were remotely similar, I got a bit of decision fatigue and kind of just gave up for a while.
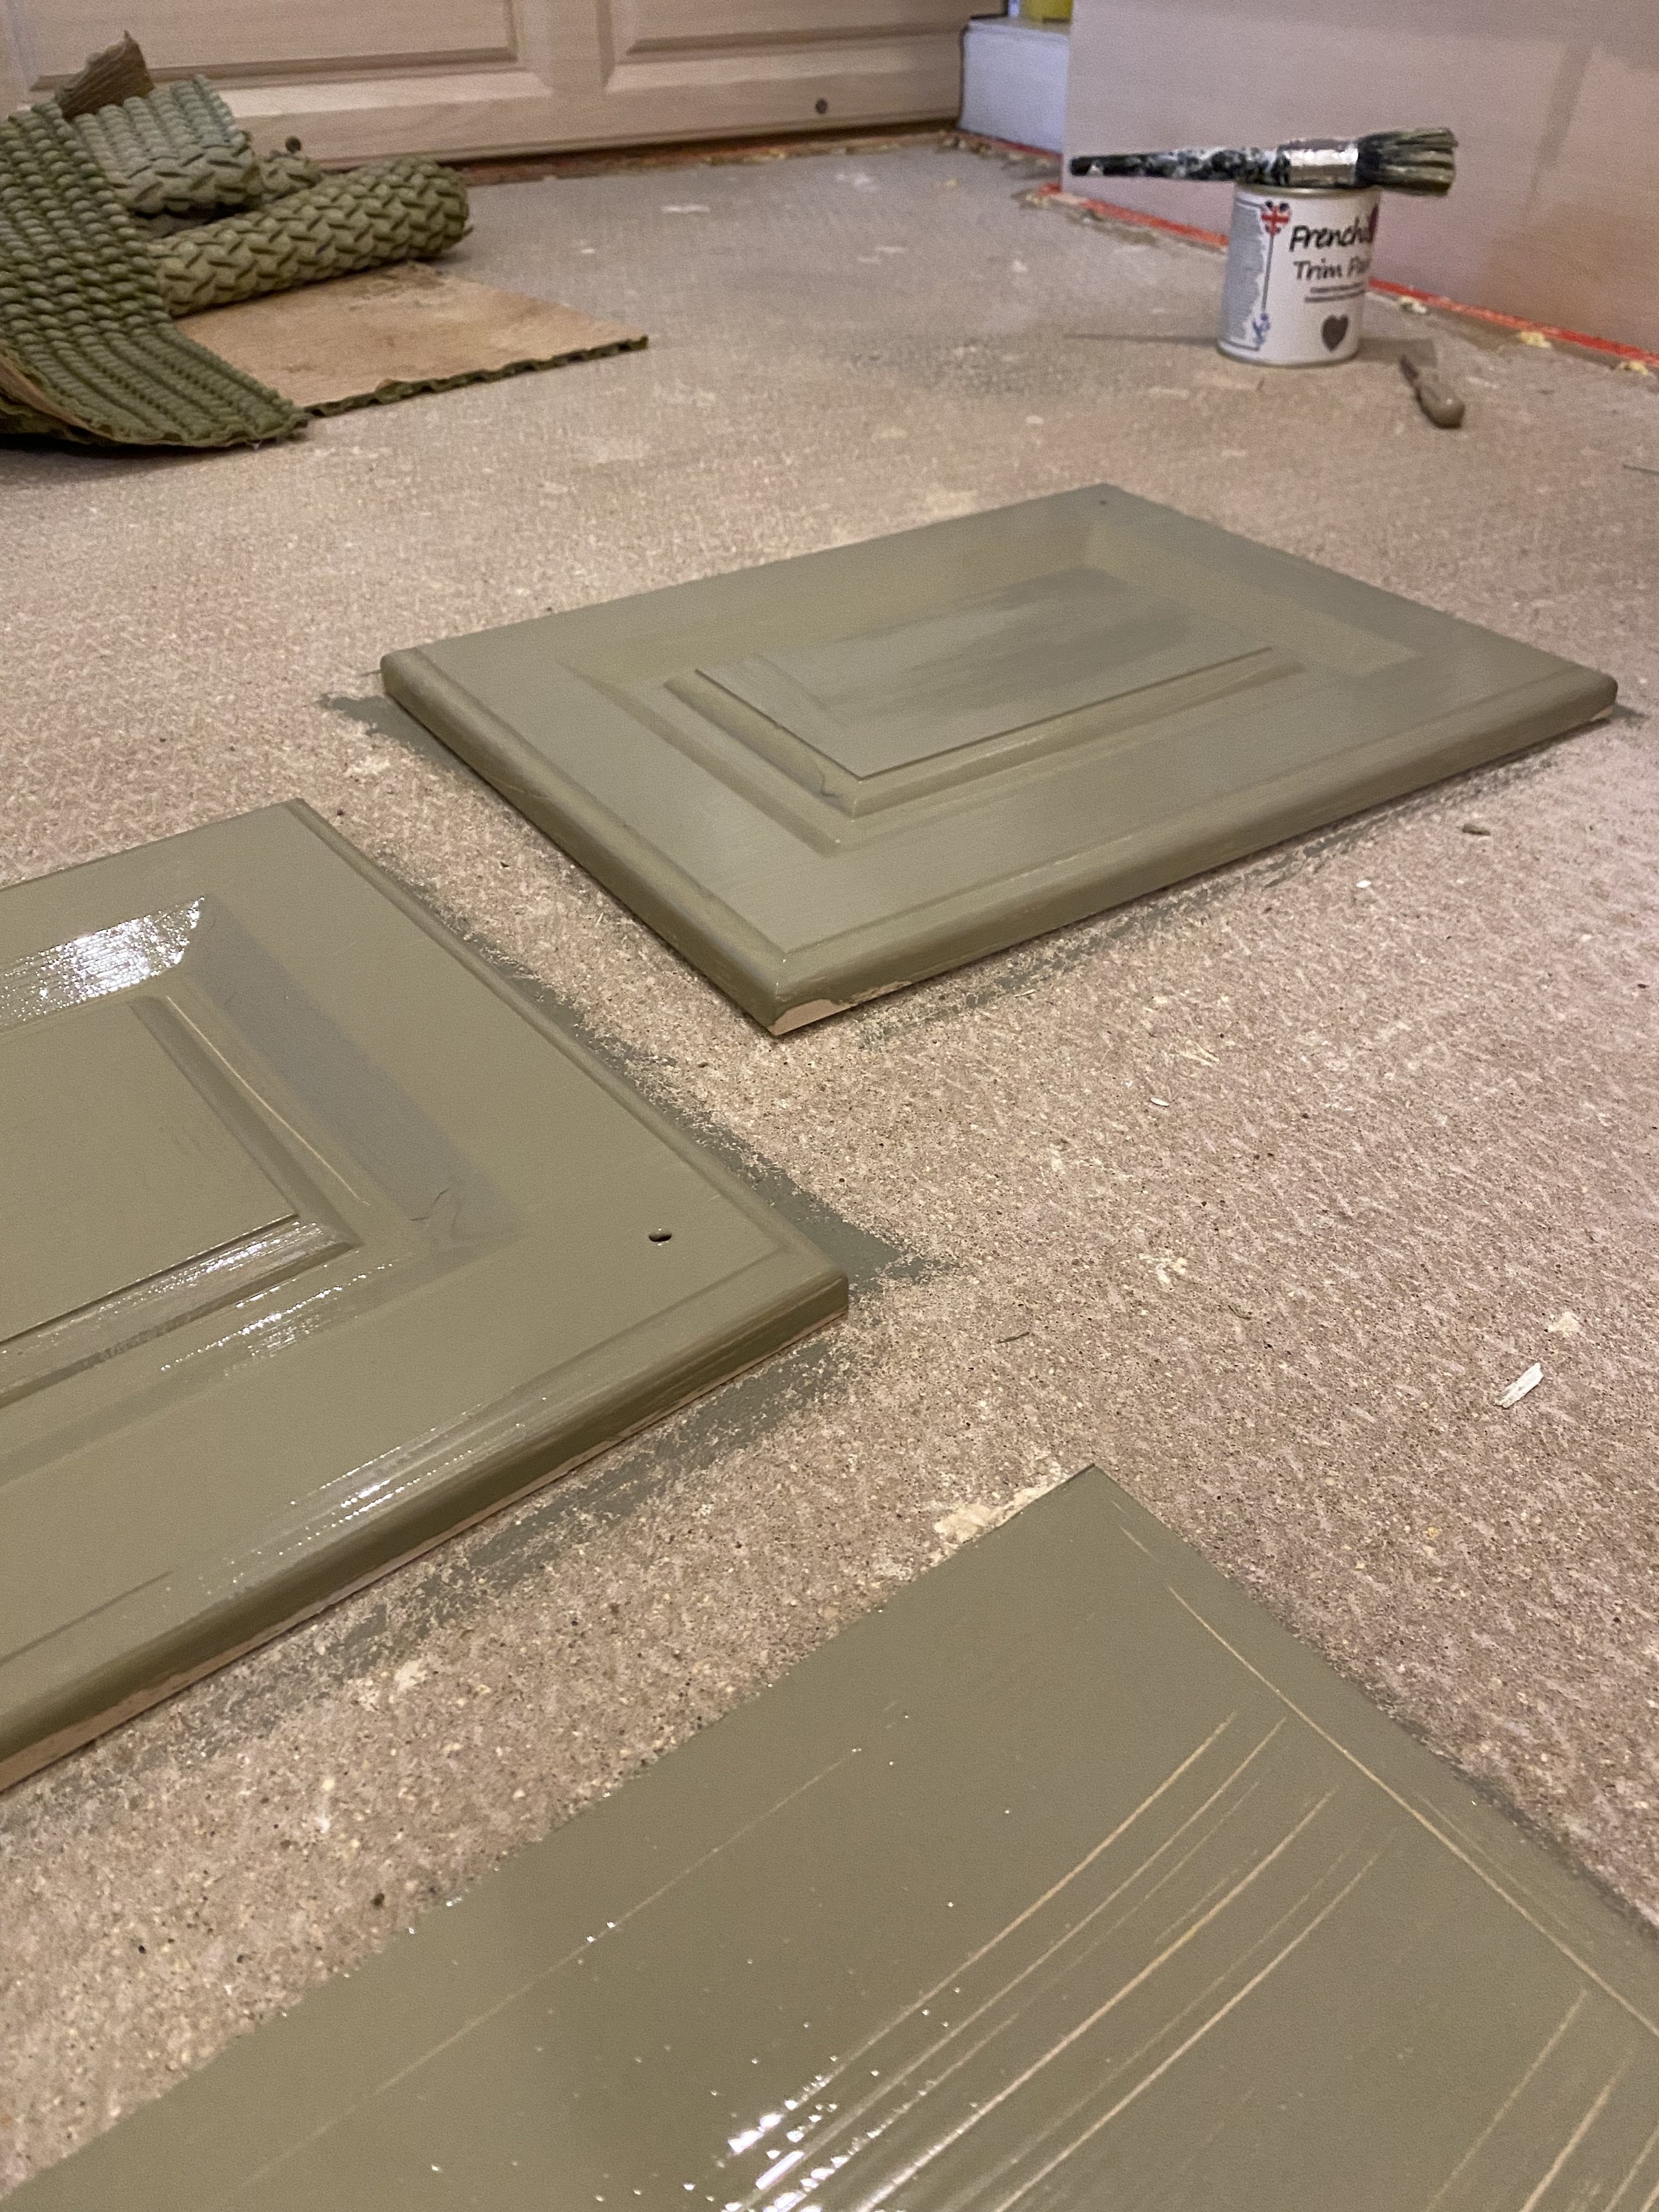
But before Christmas I decided to return to the problem. I knew the easiest thing to do with the existing vanity was going to be to paint it, rather than try DIY replace it and so that was really my starting point.

Paint samples in Olivia (left) and Funky Dora
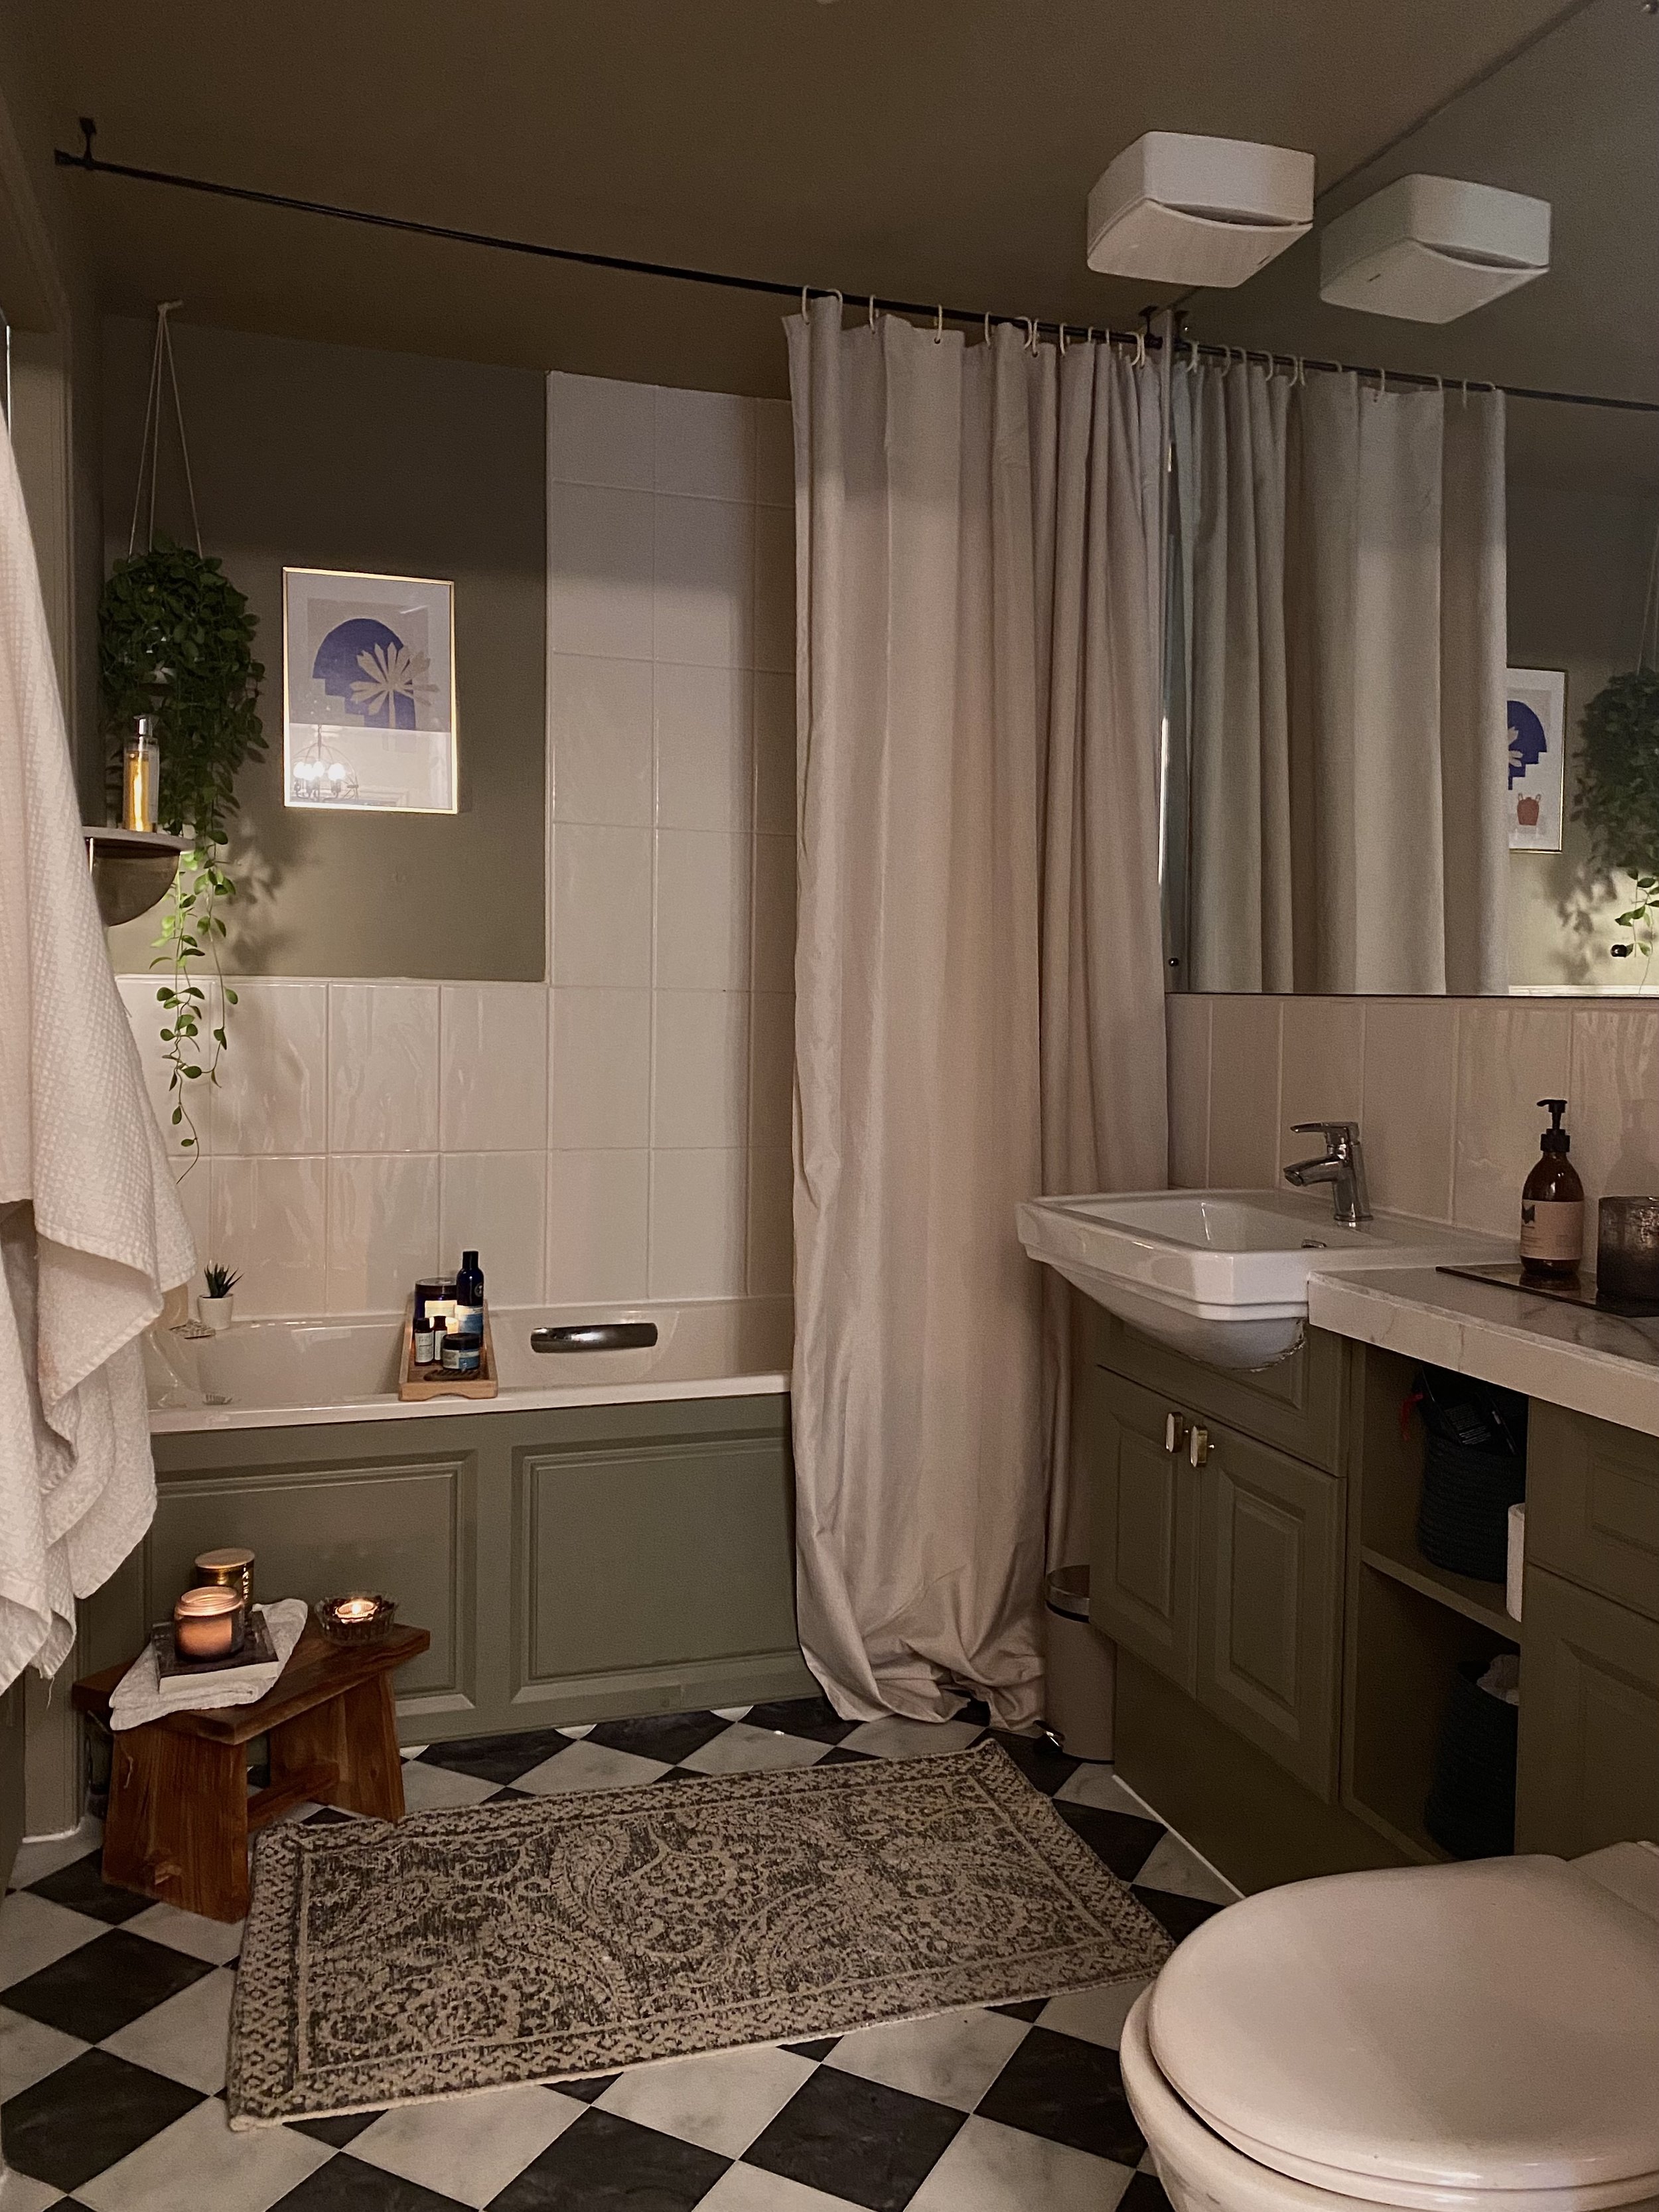
Leaning toward the modern French idea, I decided to do my usual of white walls with a black and white floor so I settled on green for the painted surfaces to introduce a little bit of colour. I ordered 2 samples from Frenchic paints, in Oliva and Funky Dora.
Both colours were warm green tones, with an on-trend rich brown undertone. When they came, I liked both of them.
So then I decided to do something I’d never done before…I was going to paint EVERYTHING GREEN.
I’d wanted to try out Colour Drenching for a while - which meant that walls, ceiling and woodwork were all going to be one colour.
As I’ve already mentioned, the bathroom was windowless, so this could have been a terrible mistake. However, I figured I’d do it anyway and if I didn’t like it - well it’s only paint.
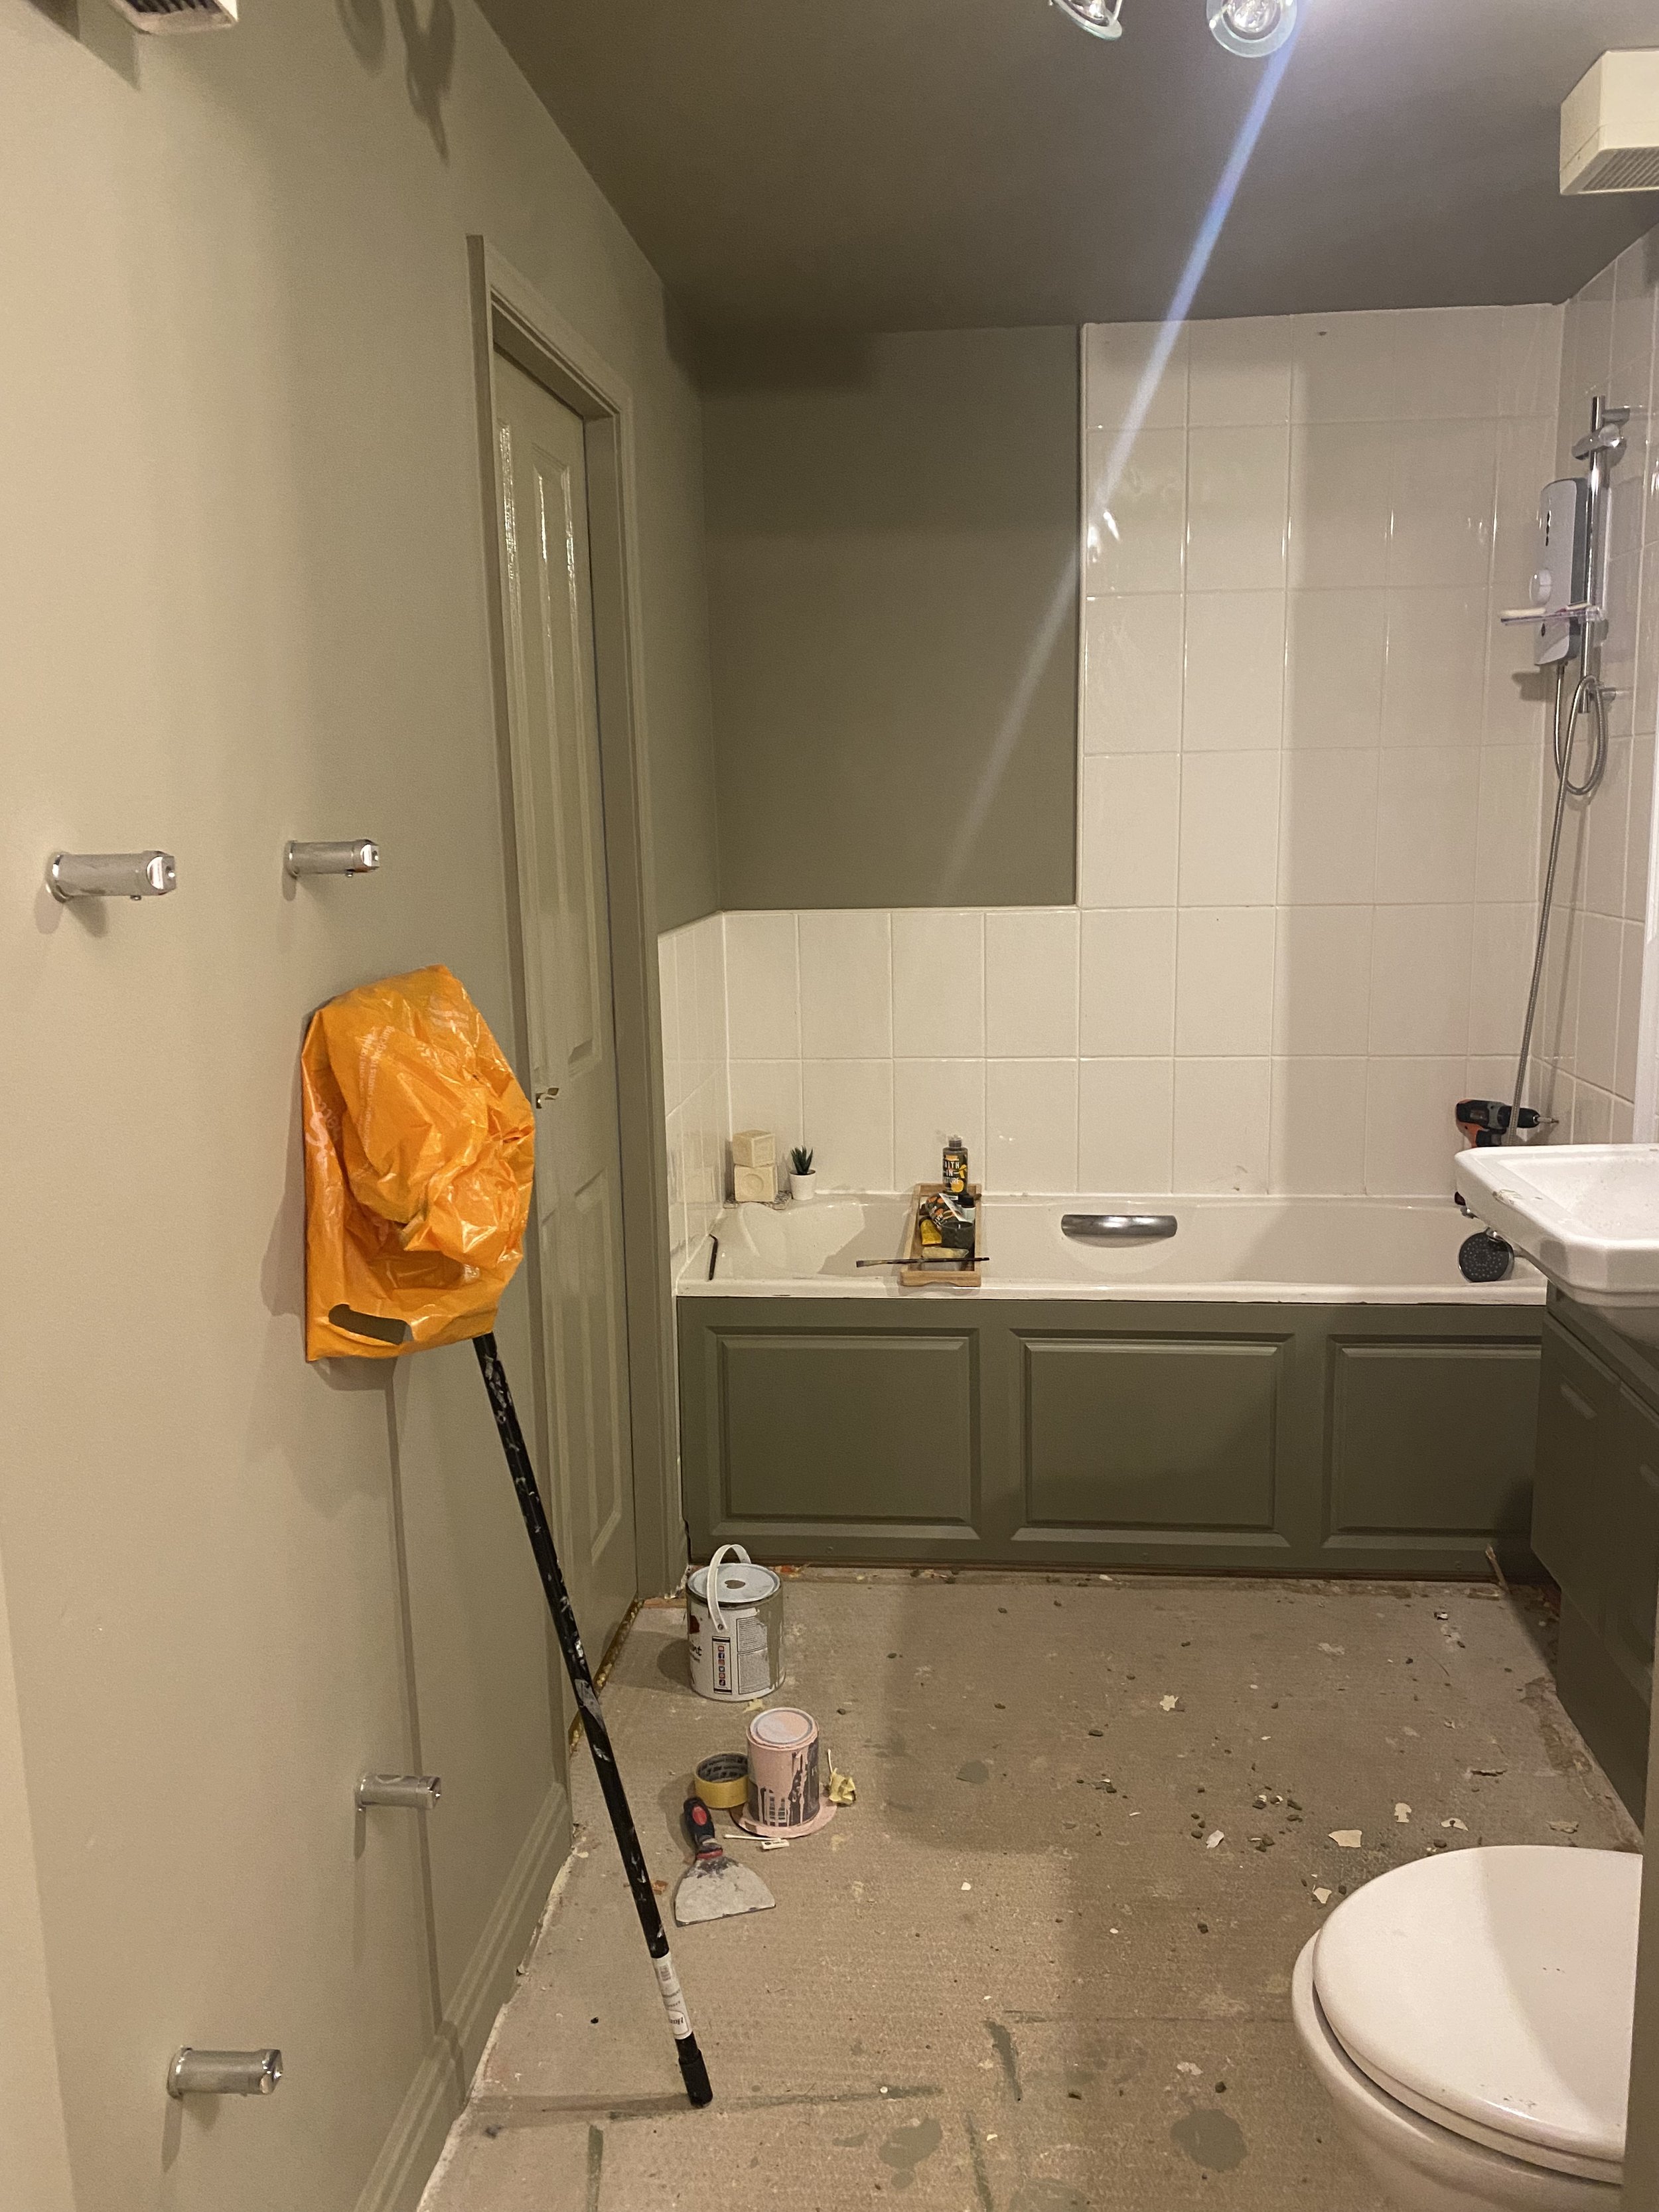
And so, the week before Christmas (with guests coming over), I ripped out the carpet and started painting…
The Frenchic paint was wonderful to paint with, rich in colour with great coverage….and was it scary painting everything such a dark colour?
Yes. Yes it was.
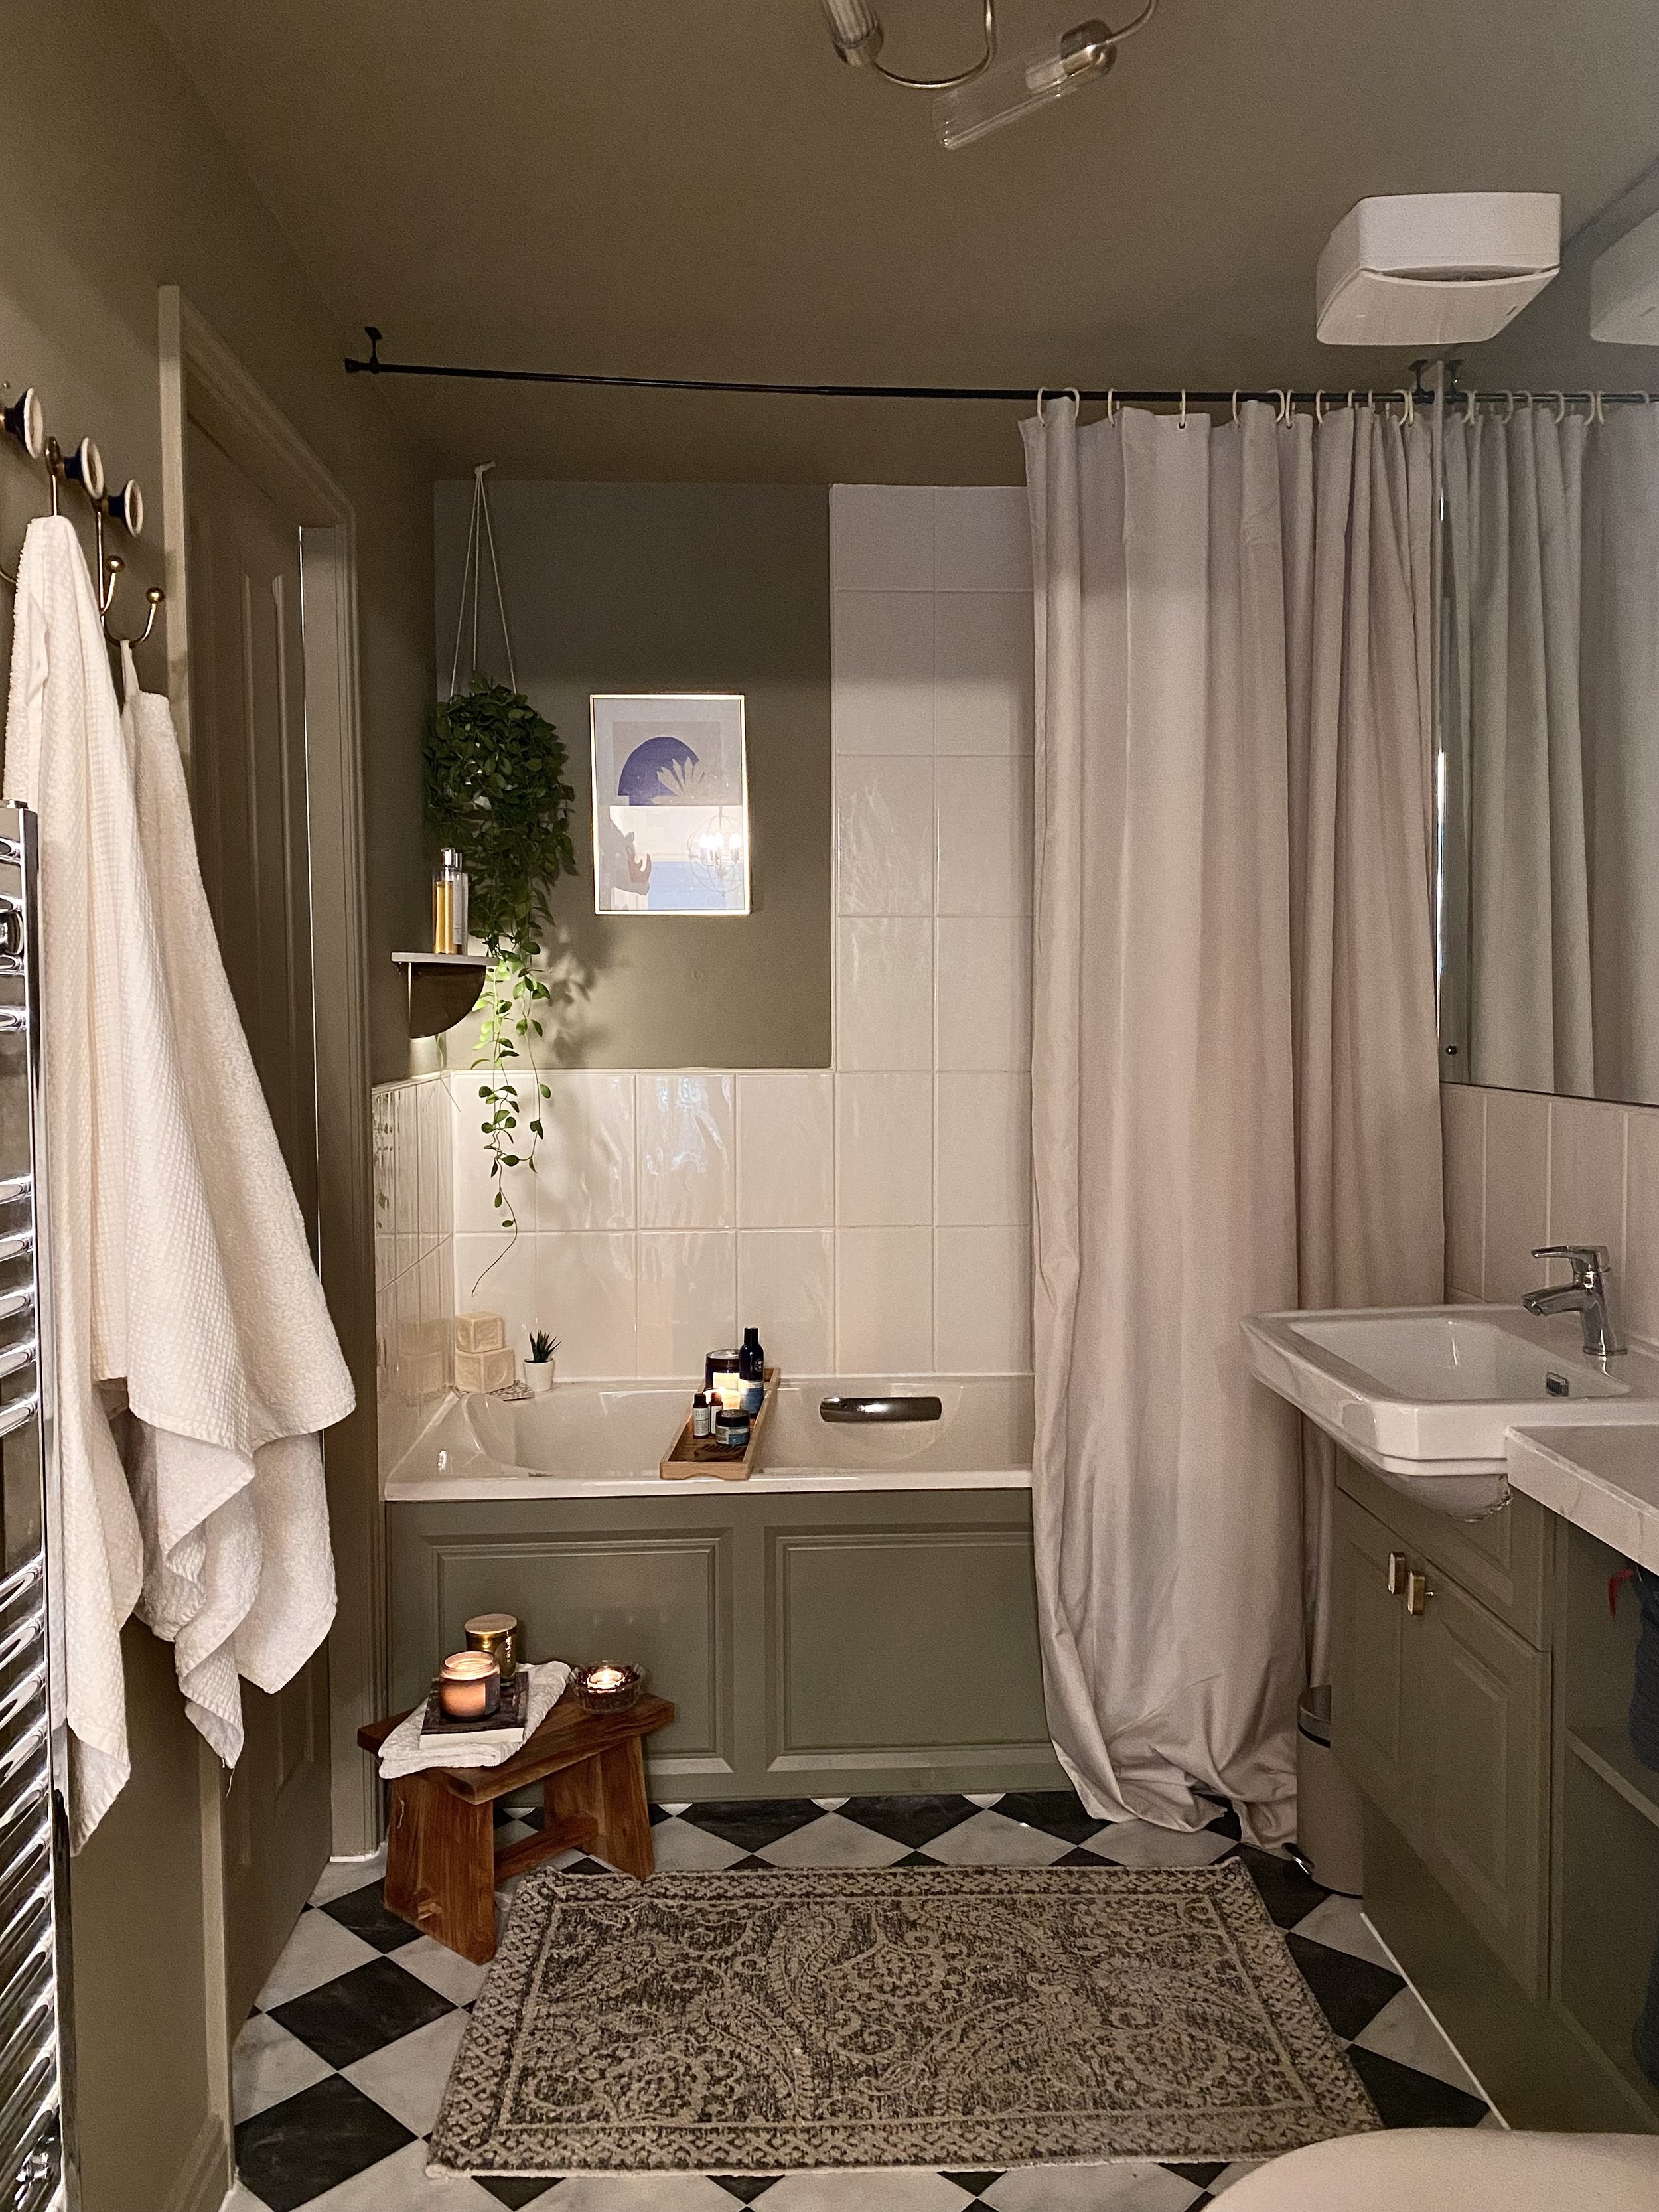
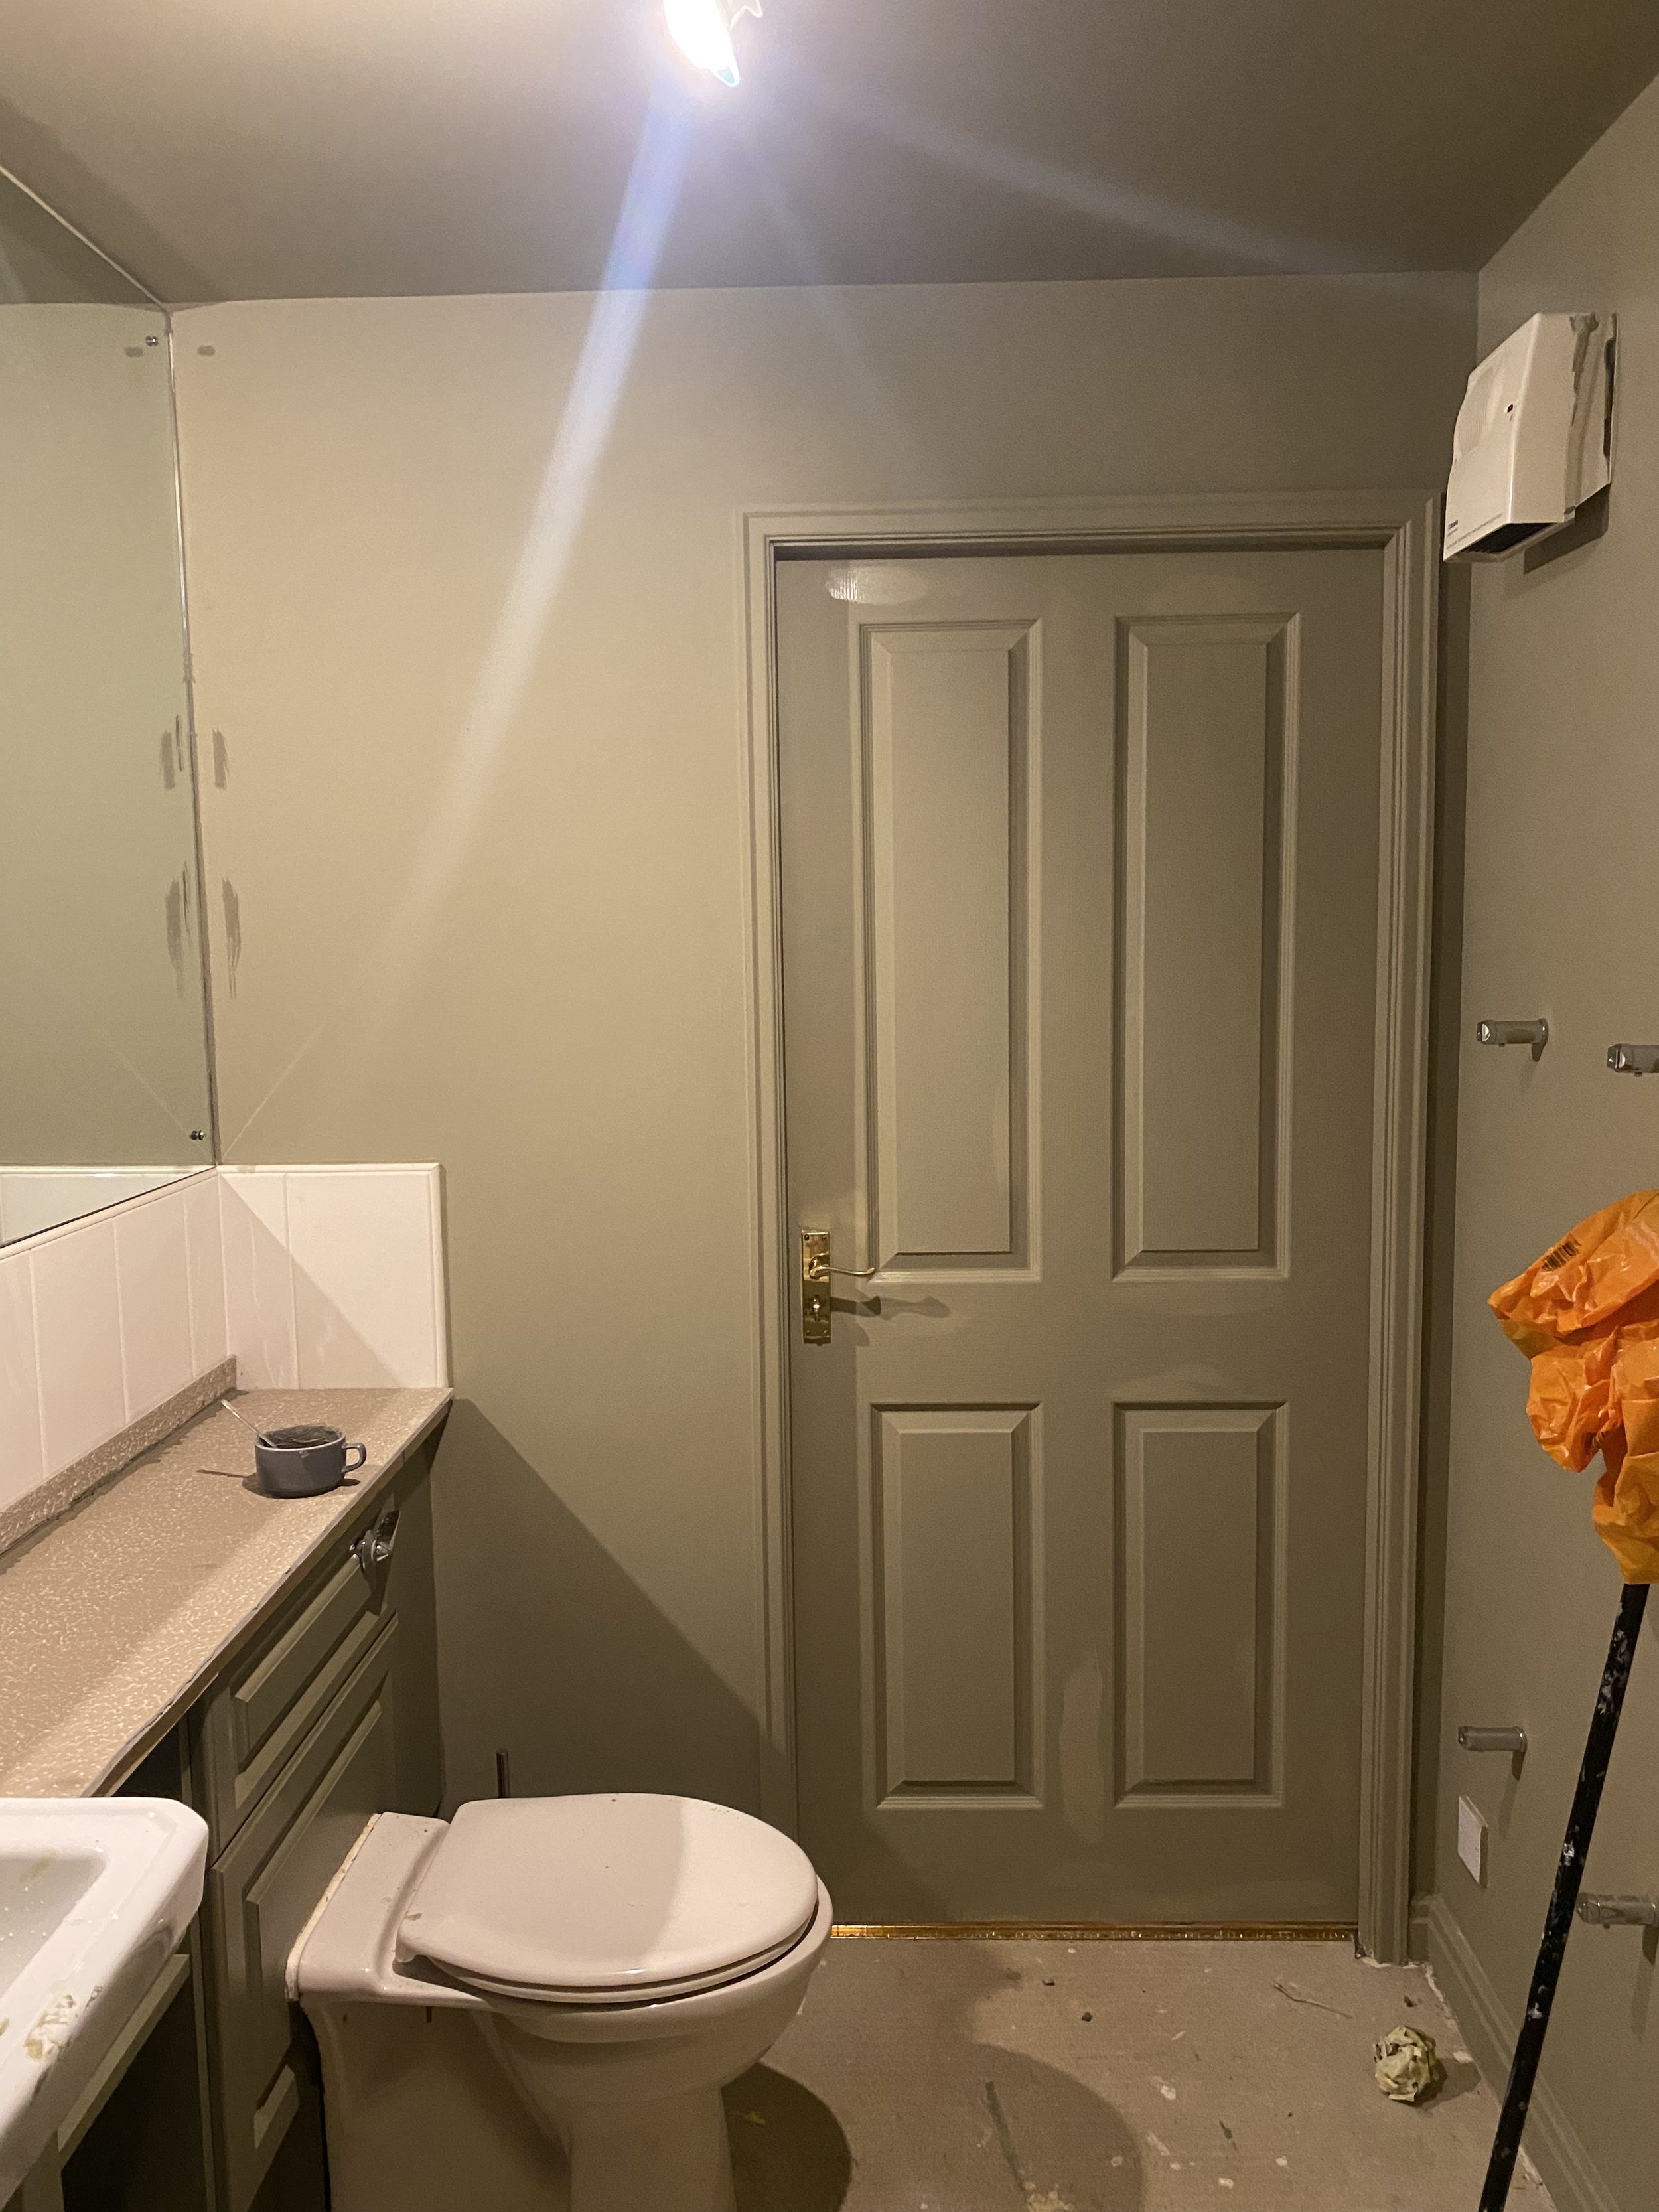
But I kinda loved it, and I enjoyed pushing myself to try something different. My bathroom is a Jack and Jill style, so painting the doors helped to make the space feel more together rather than being broken up by white doors and painting the skirting boards just elevated the space - it looked so chic!
I used the Funky Dora for the colour drenching and Olivia on the vanity cupboards and bath panel. To be honest, the difference in the colours is so subtle I might as well have used the same for both.
In all, the paint cost £64 and I think it was well worth it, given the quality and the colour pay off.
To finish the painted vanity, I took a large format marble effect tile (120cm) and cut it down to size, slotting and then fixing it in place to create a new top that I could easily remove if I needed to access the pipework behind the toilet.
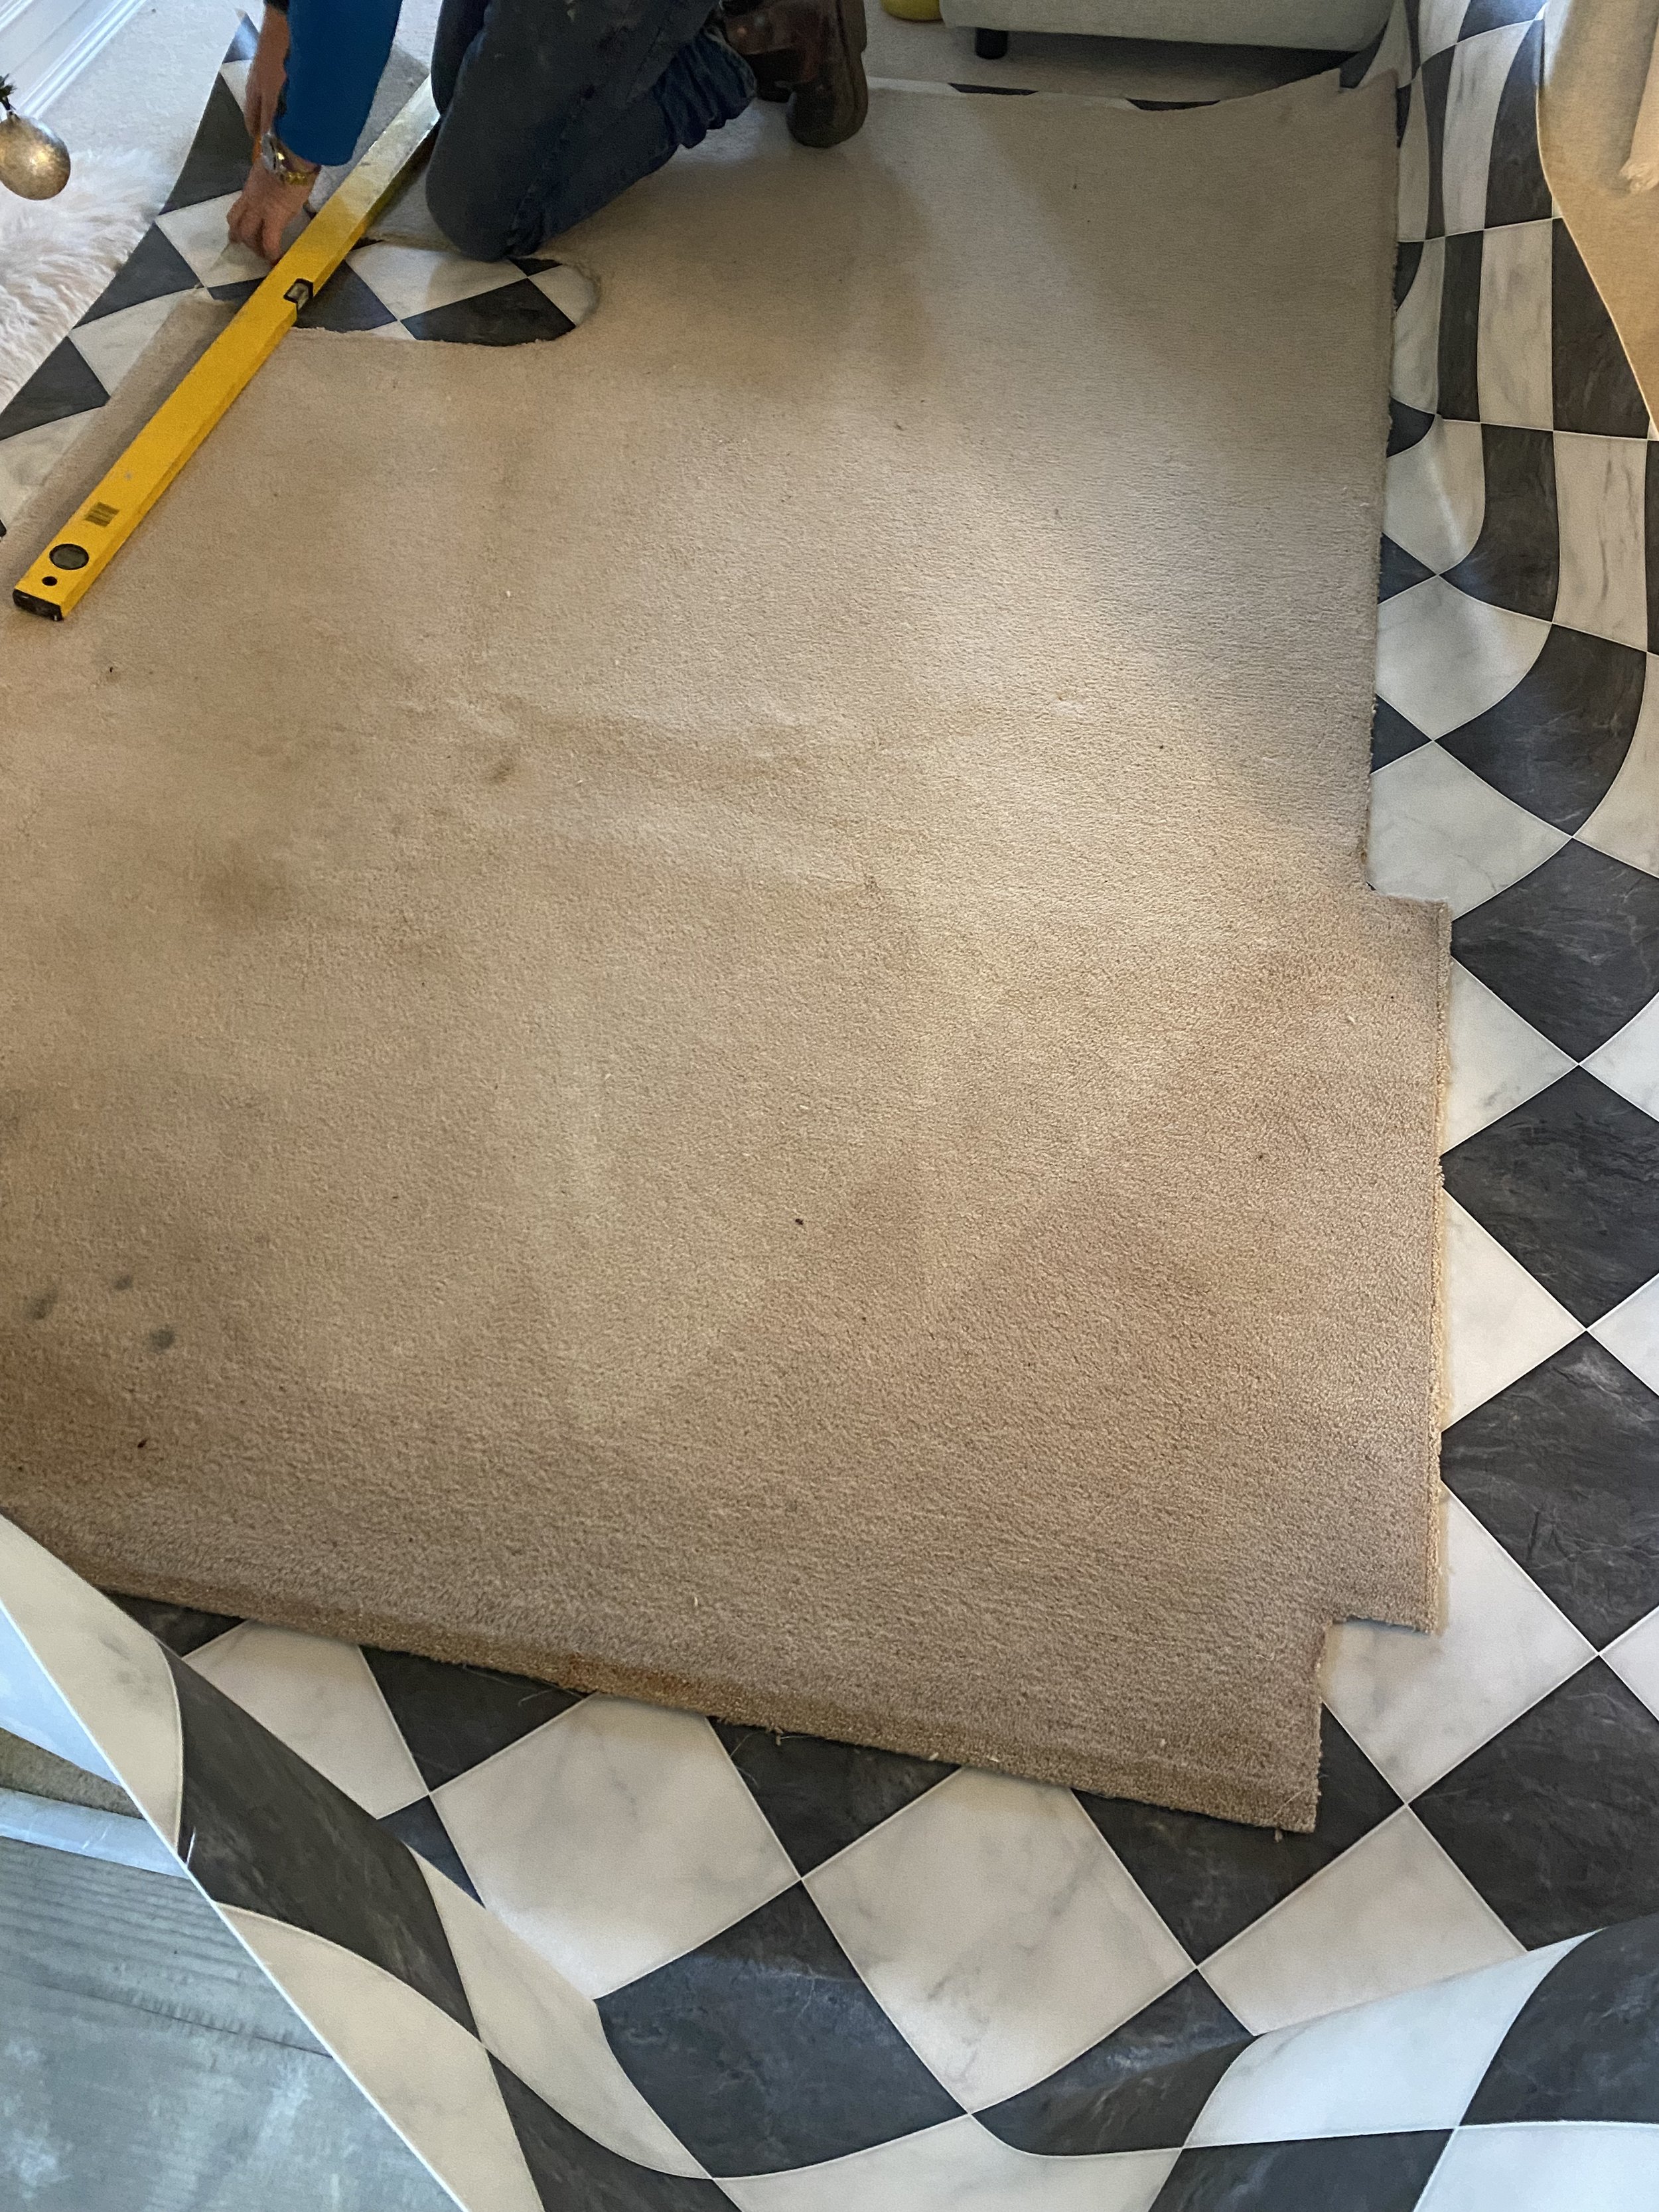
I moved on to the floor - I knew I wanted black and white tiles but I wasn’t about to retile this yet. It’s something I’ll do properly when I eventually replace the whole bathroom. So as an interim measure I chose some sheet vinyl from Tapi Carpets (Rapport Ettiene was the style I chose). At only £20per m2, it wasn’t exactly going to break the bank - but I headed down to the showroom anyway to see if they had any offcuts. I was in luck and I ended up with the perfect size piece for just £70.
I was warned that it can be fiddly to fit so luckily my stepdad was around to help me do it. We used the old carpet to make a template, cut the vinyl pretty much to size and did the final fitting in the bathroom.
It wasn’t the hardest of jobs but it definitely wasn’t the easiest, so if you’re going to do this yourself, be aware that it’s maybe a 2 person job if you’re not feeling overly confident.
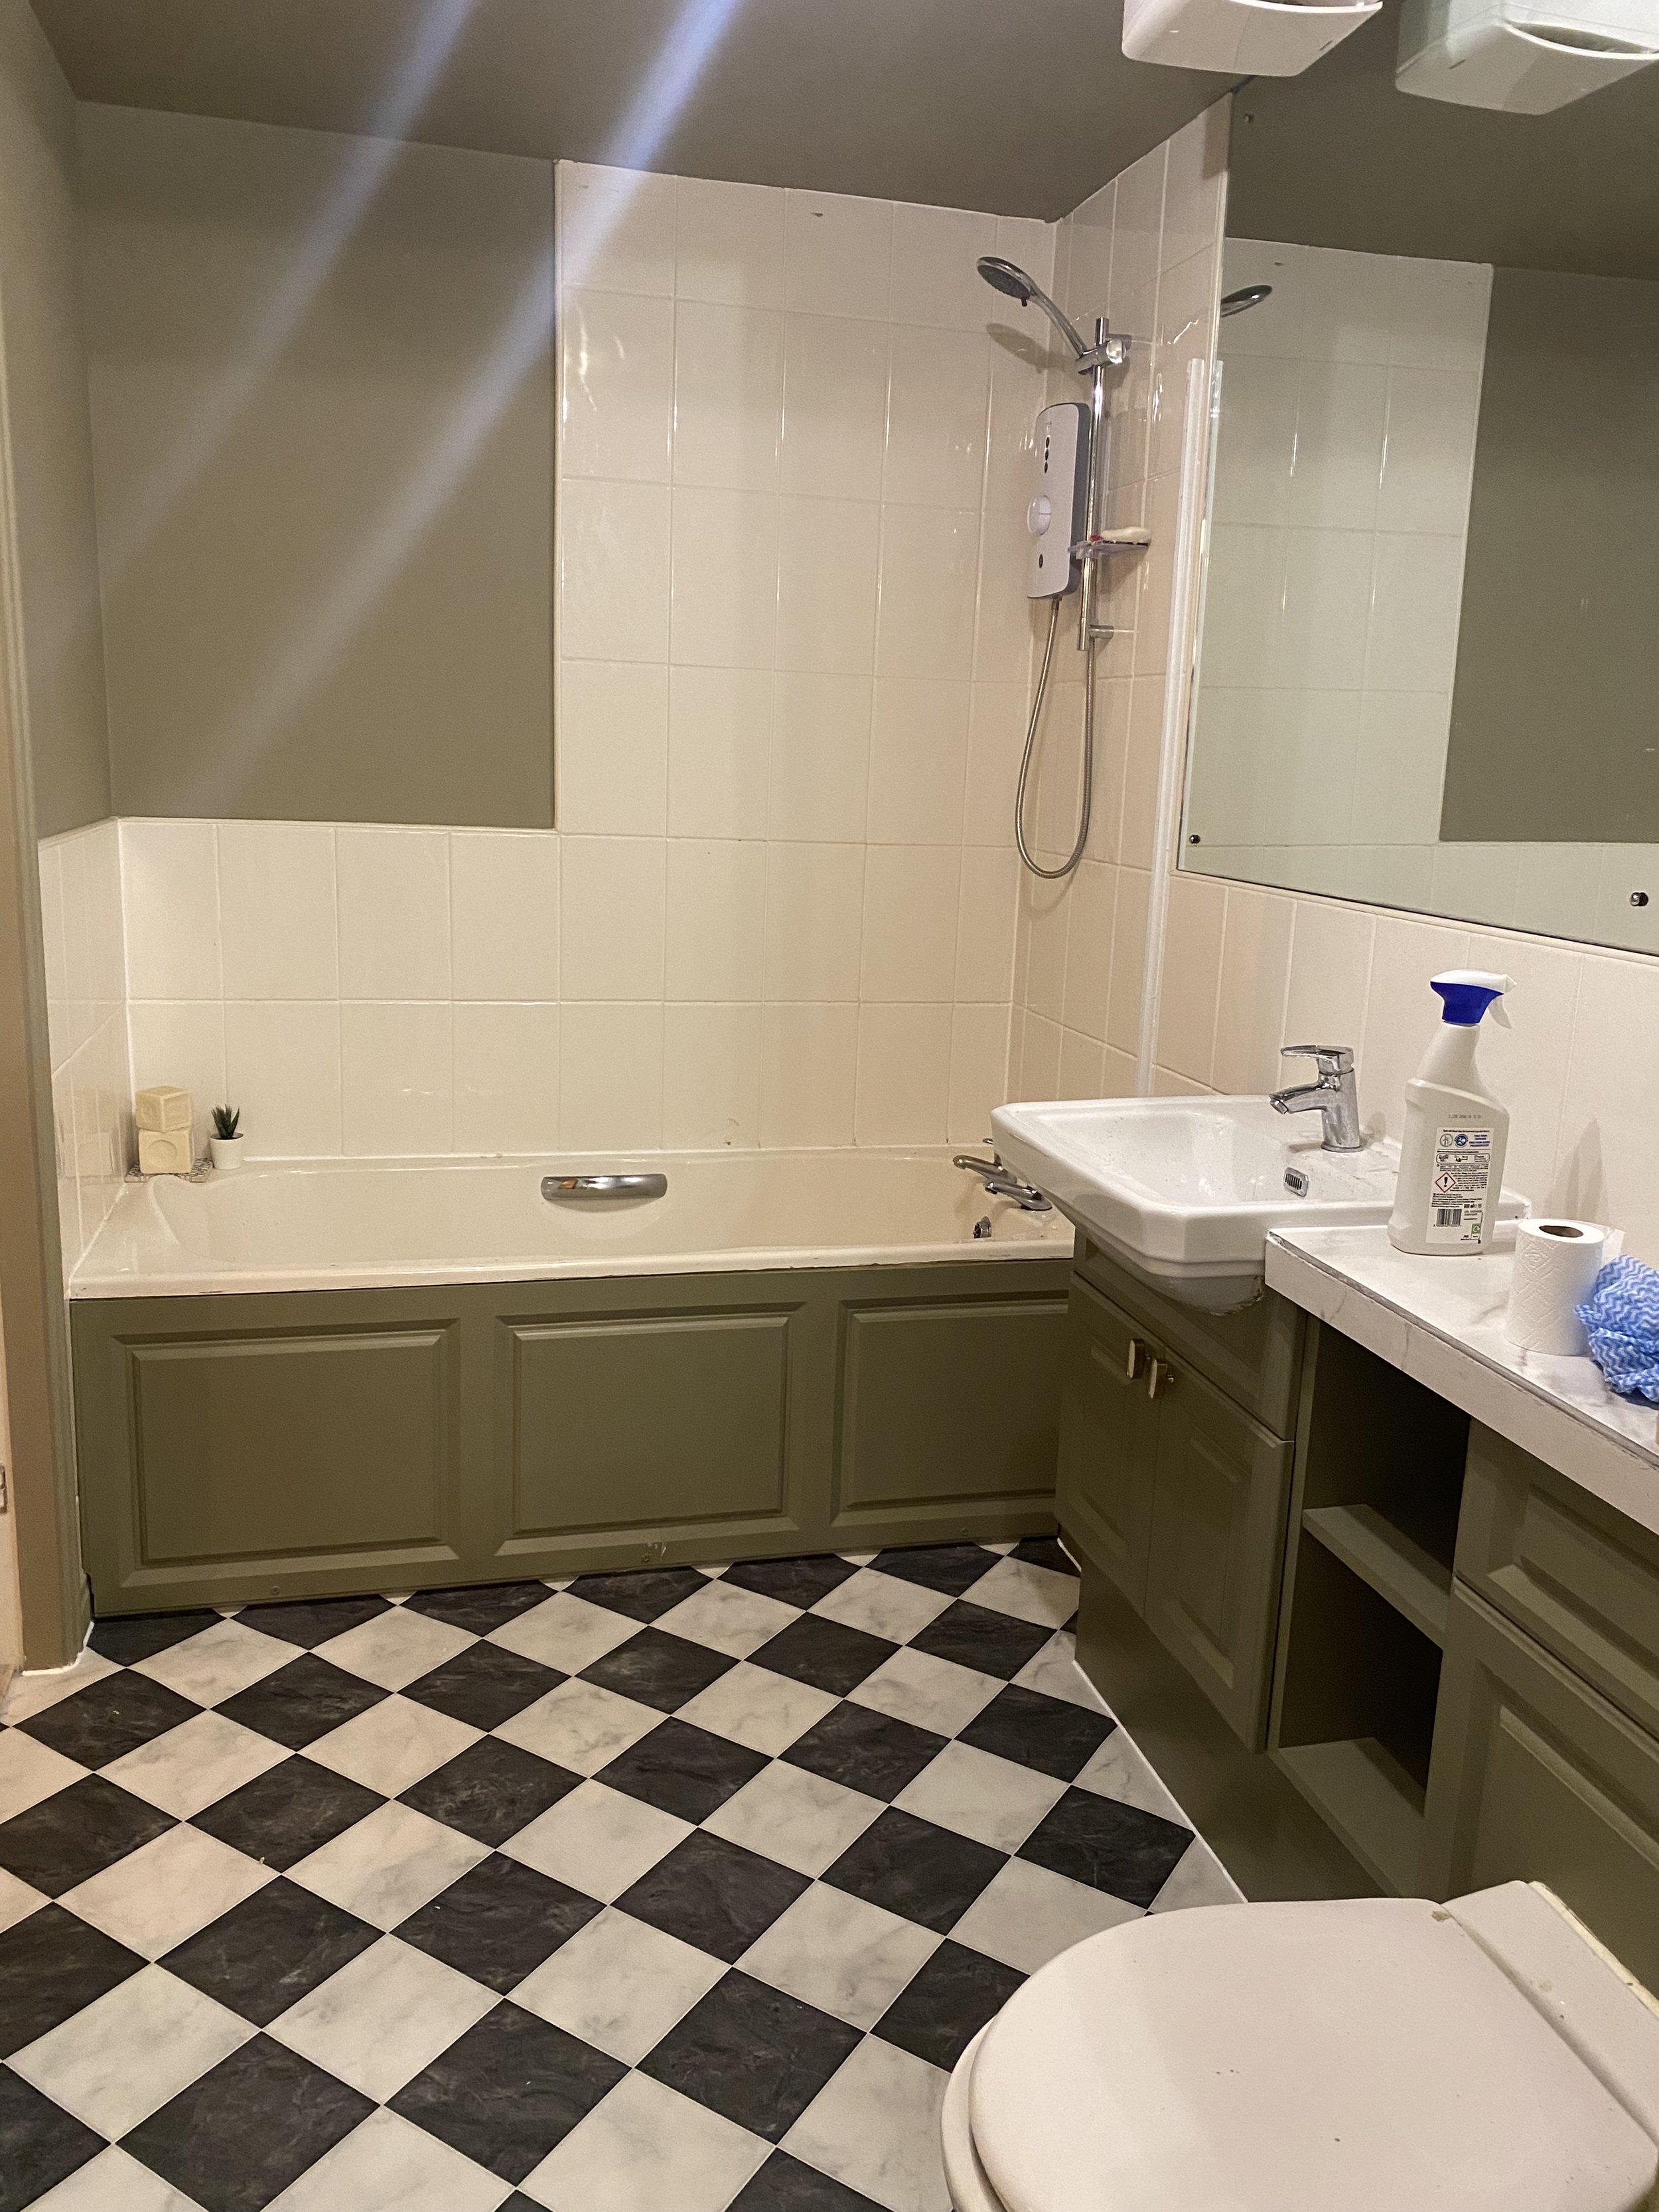
The flooring transformed the space and I could finally see my vision coming to life.
The hard work was done and now it was time to accessorise.
I replaced the old worn out shower screen with a floor length linen shower curtain from Amazon. I might swap it for a screen again but I’ll wait until I change the bath. For now I like the curtain, it’s easy to clean and it feels a little romantic and adds some softness to the space.
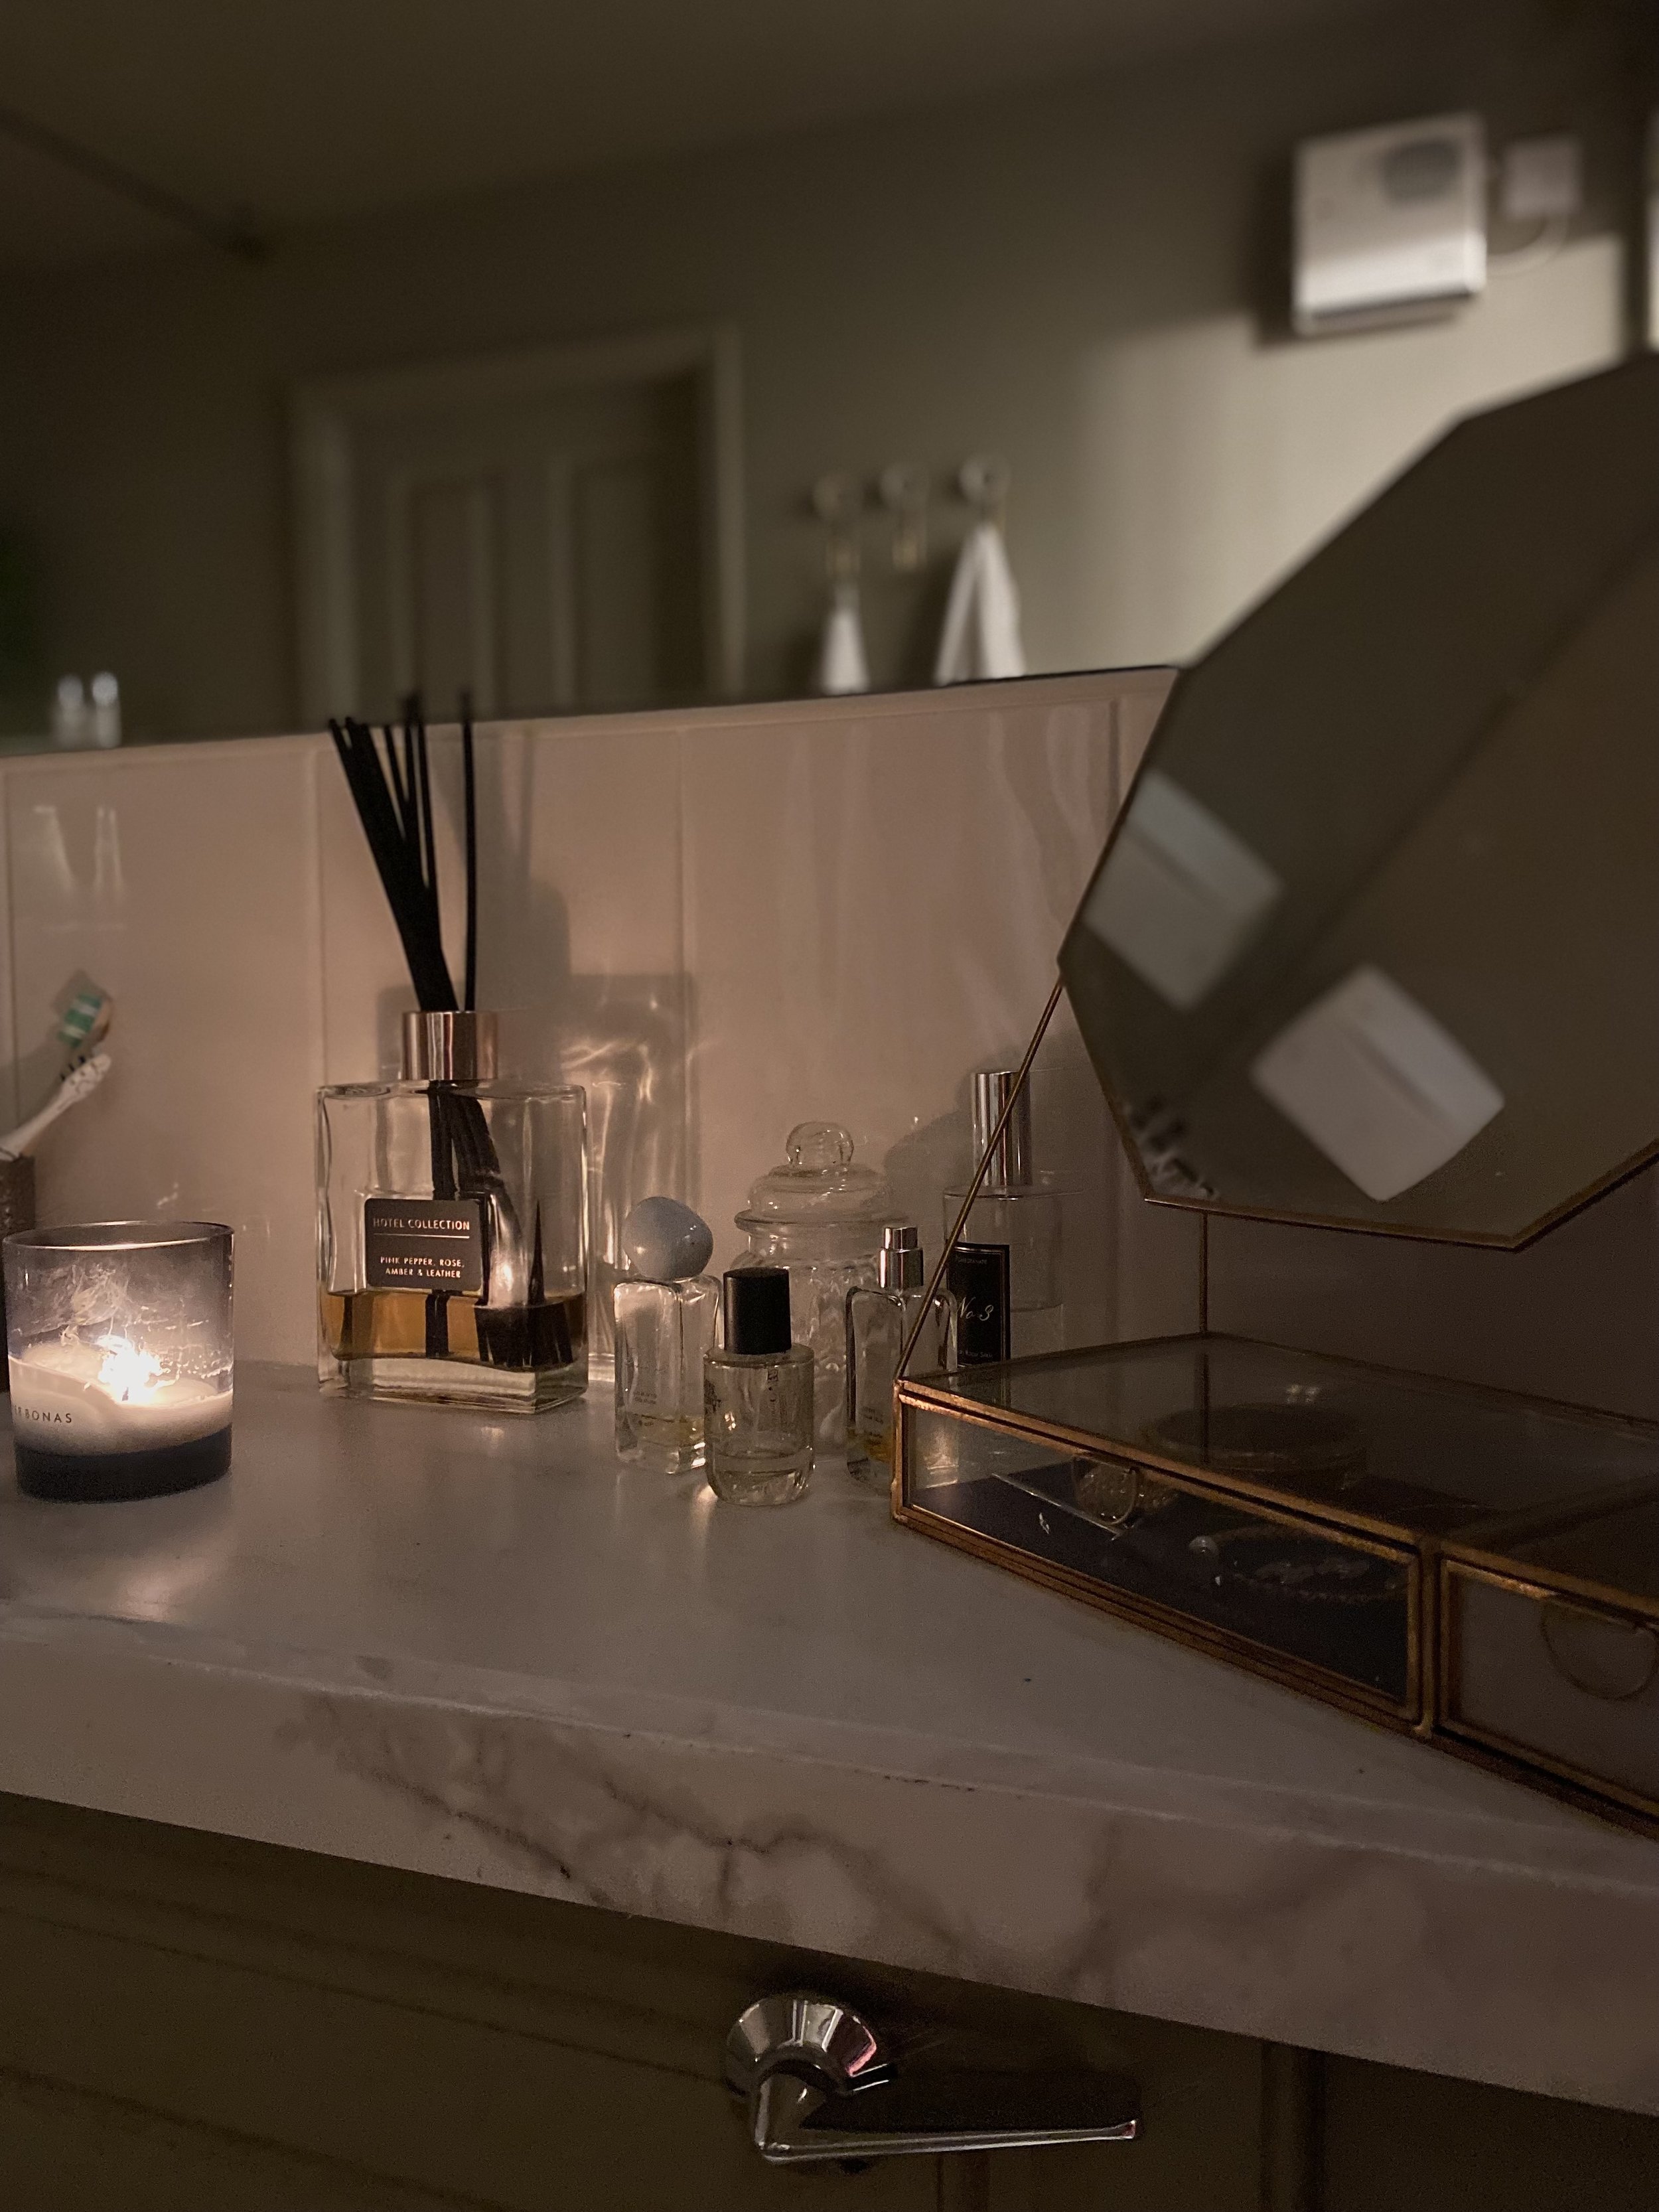
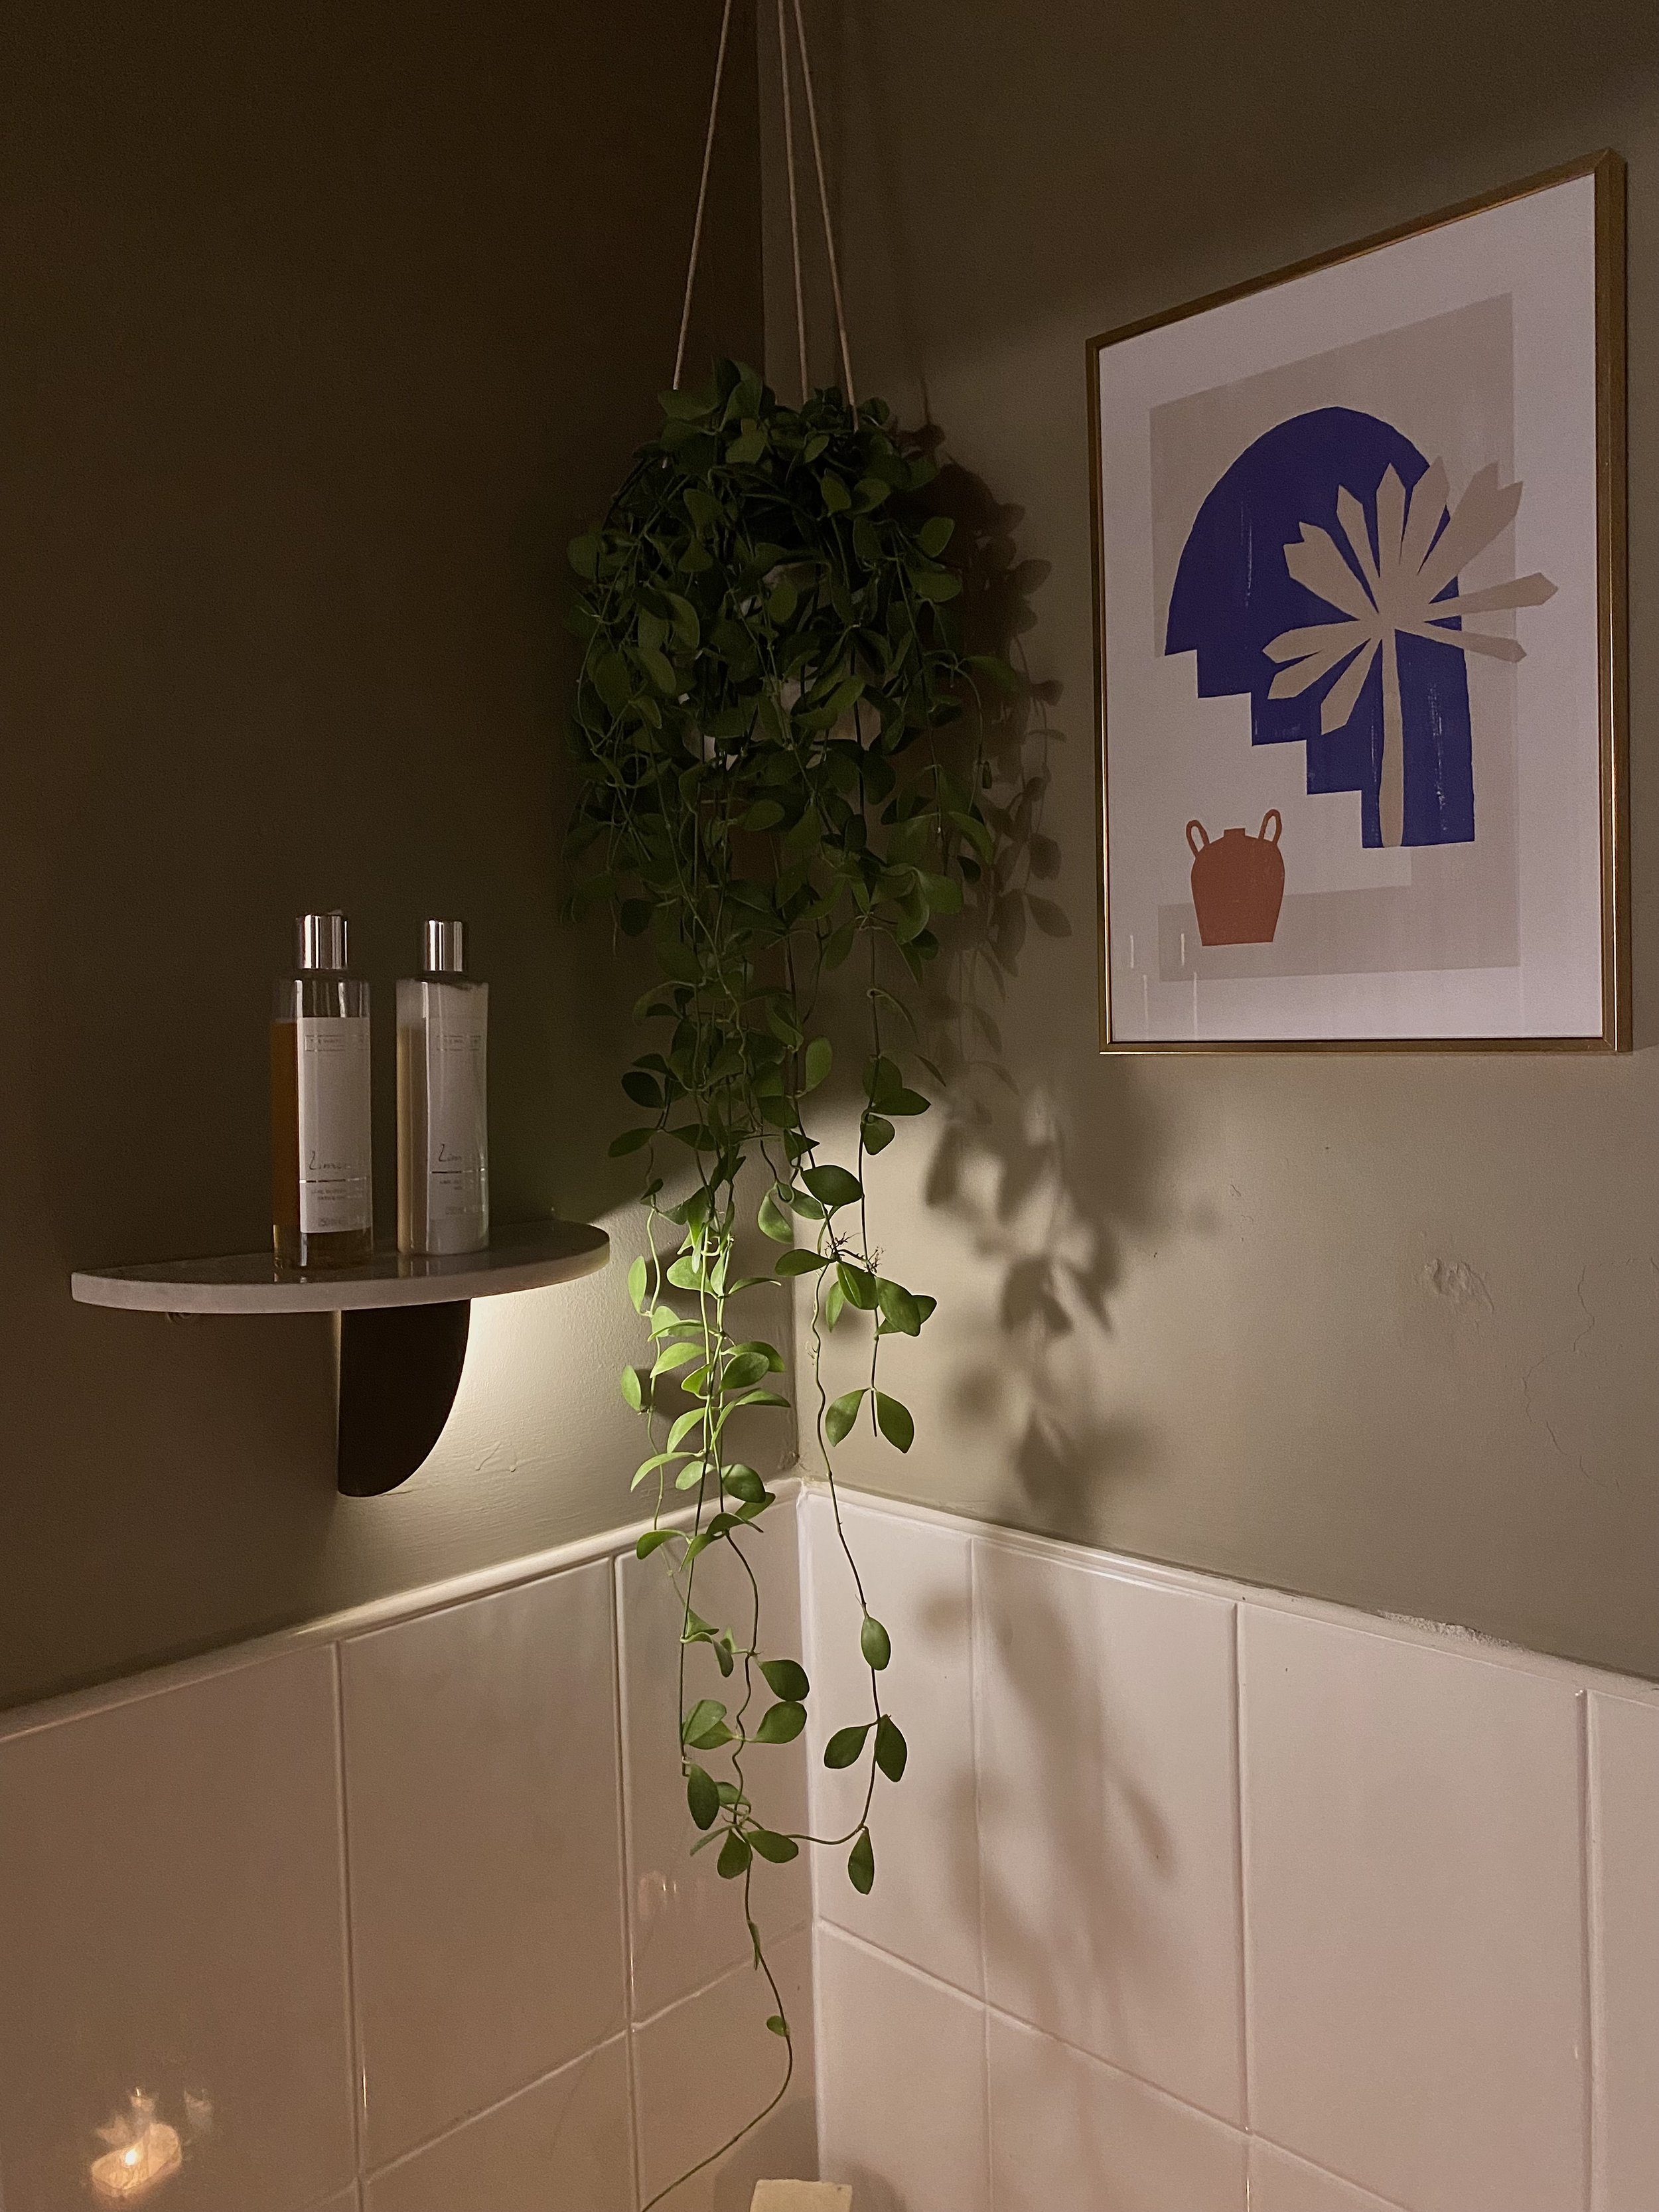
I bought a new bathroom light from Habitat with kind of an art deco vibe and a marble shelf from H&M home, to tie in with the marble vanity top. The marble shelf is in the shower area so I have somewhere to keep my shower gel that isn’t hanging round the edge of the bath.
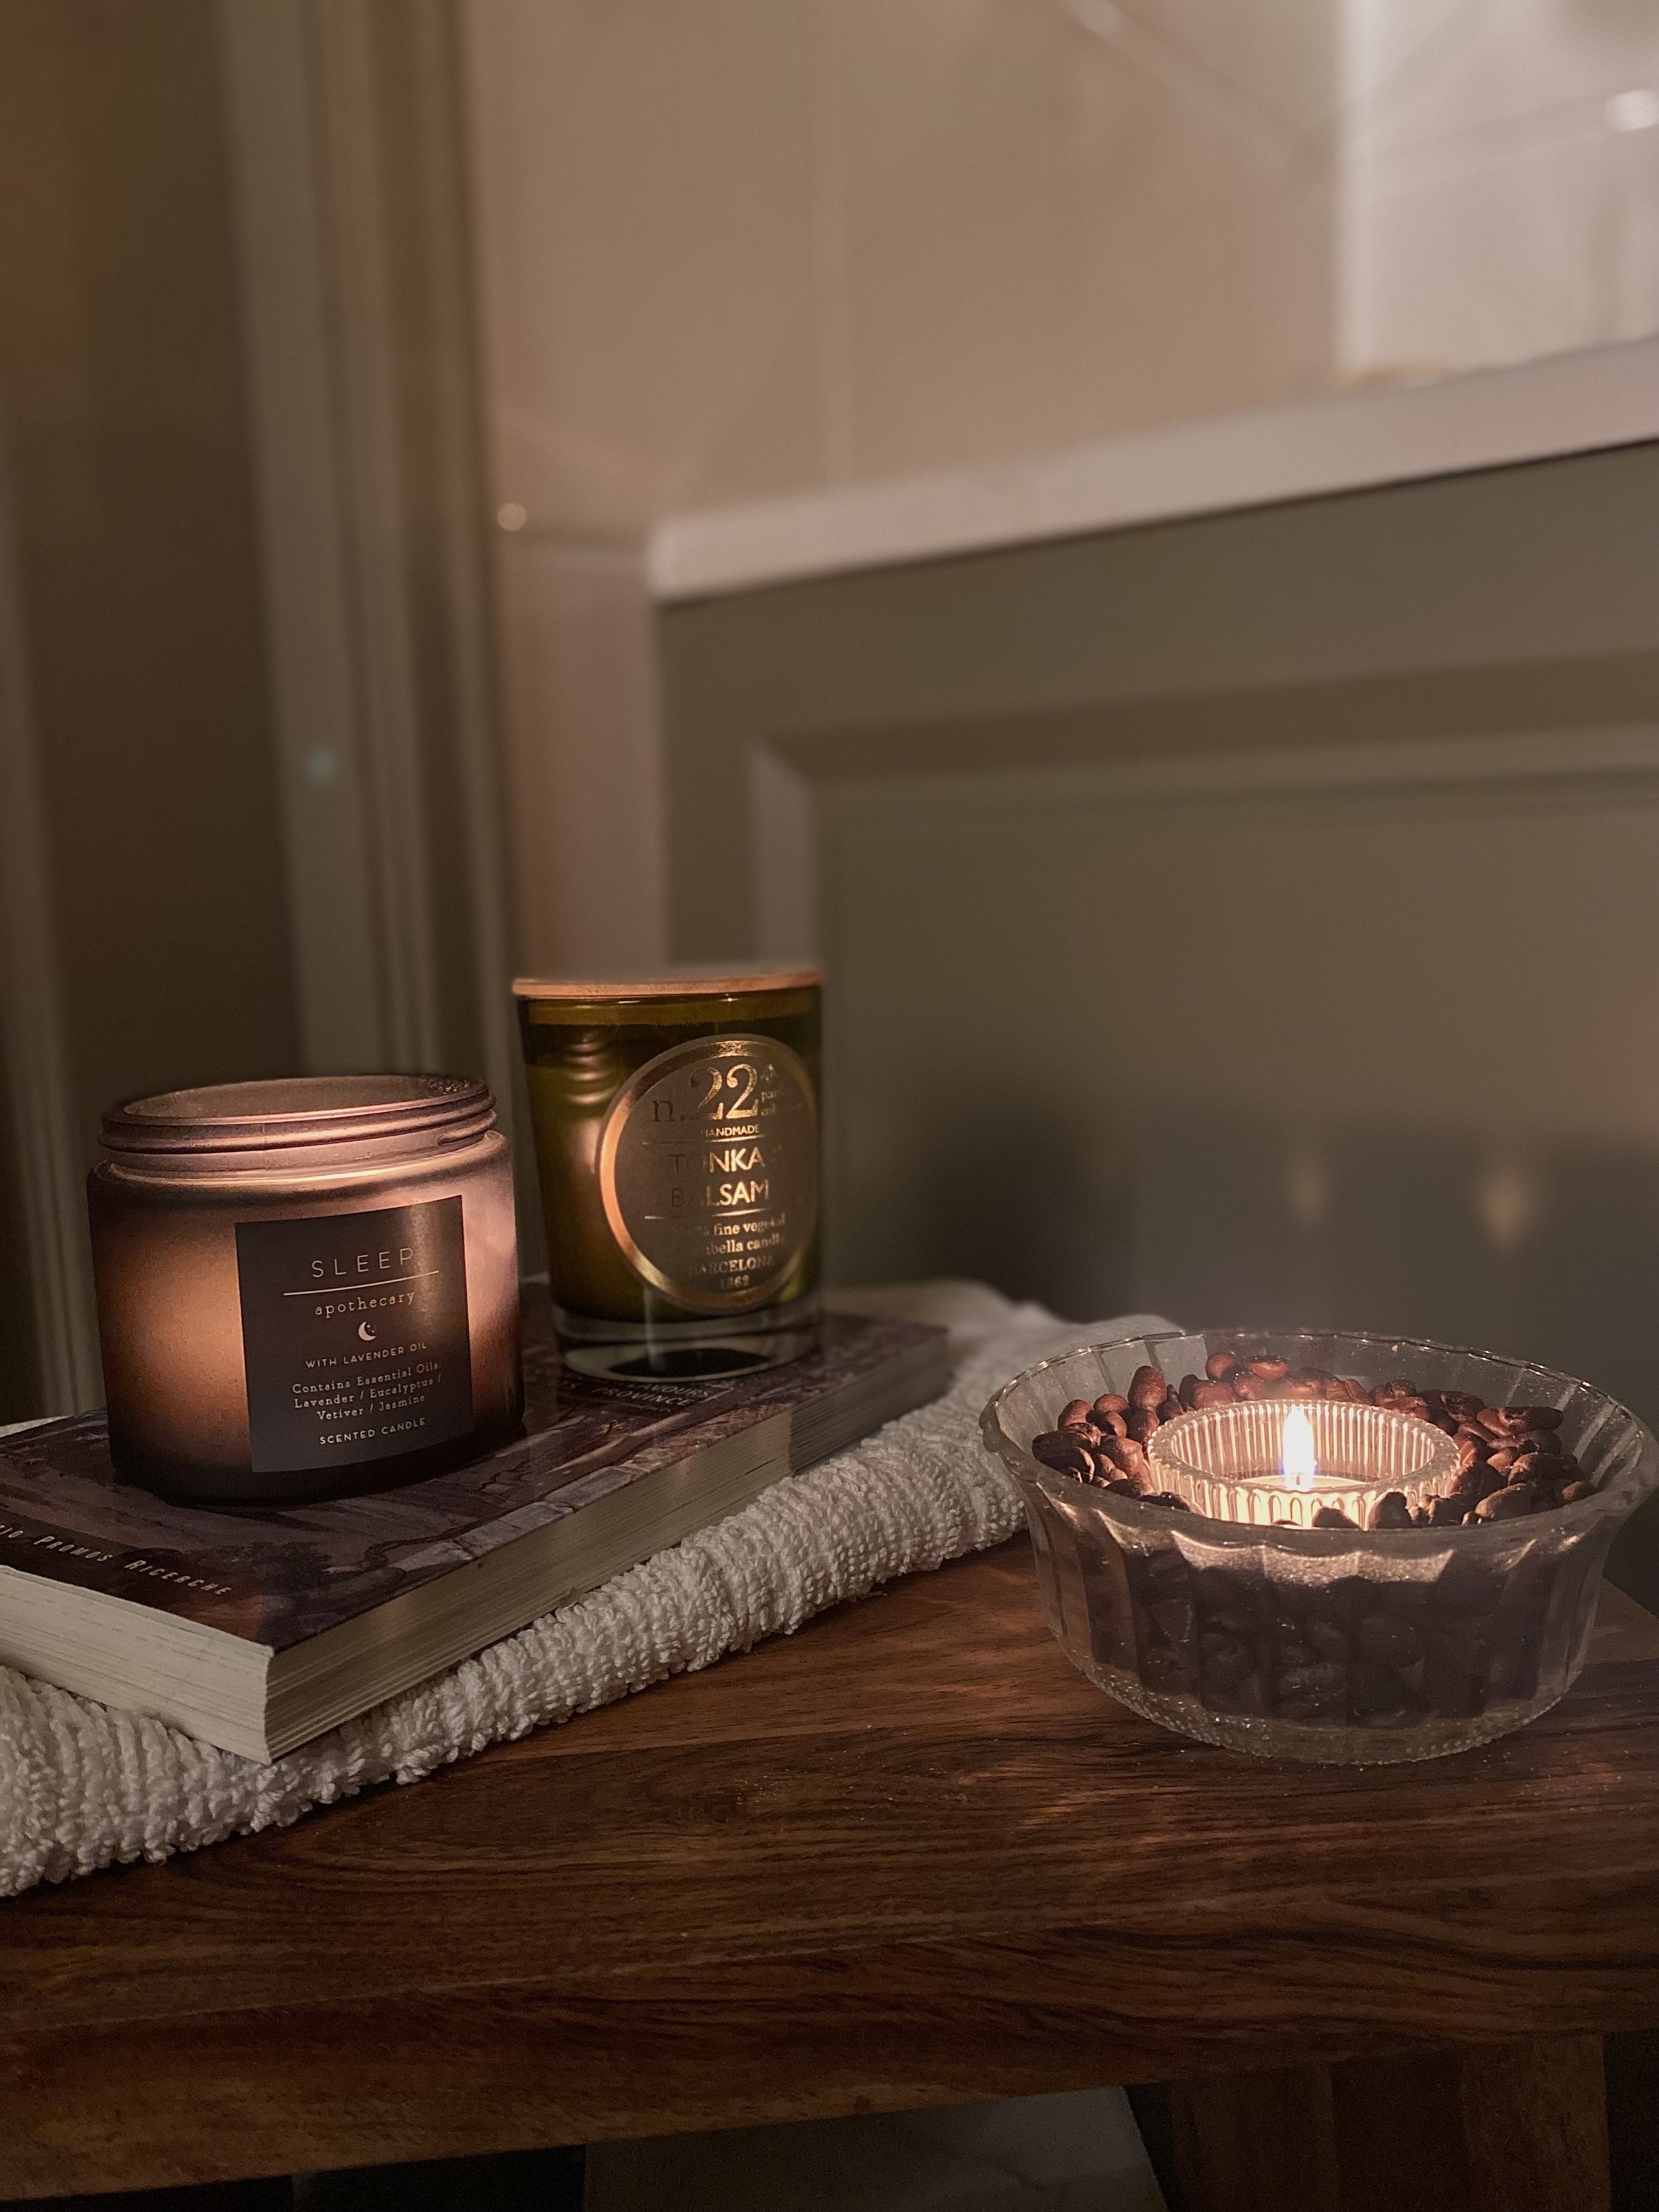
I wanted to add some mood lighting
( just because it’s a bathroom it doesn’t mean you can neglect the ambience)

Some battery operated mood lighting….
I invested in a plug in Ikea Arstid wall light. I removed the wire, fixed it to the wall and hot glued a battery operated puck light to the inside of it - a top tier Instagram hack. I also added another puck light under the marble soap shelf so I’d have a little more light in the shower.
To further accessorise, I added a bath mat, a wooden stool and of course some artwork and a hanging plant.
I know it’s just a bathroom but it’s the little touches that make all the difference. I have chrome taps that I wasn’t changing but that hasn’t stopped me from using gold accents. I love a mixed metal, I think it’s a real fun touch that feels more interesting than matching everything.

Finally, I put up some robe hooks that I’d bought months ago from TK Maxx. These have turned out to be my favourite thing in the bathroom - not only have I got somewhere to hang my towel, but I have a spare hook for hanging my pyjamas on.
This is a luxury I didn’t know I needed to be honest. But getting home on an evening and just being able to get changed into something comfy by plucking a cosy pair of PJs from a golden hook - well it’s just a delight.
So now I’ve had a month or so in this bathroom - here’s my honest review.
I do love it. It feels so fancy especially when I use the lamps and candles rather than the big light and it really just feels like quiet luxury to me.
Like I’m taking a few minutes out my day for myself.
And it certainly makes washing my hair less of a chore.
Do I like the green?
Yes and no.
I love the colour, I love the ceiling, I love that I’ve been brave and it actually does make the room feel bigger.
But if I can live with it for a long time, that remains to be seen.
I wouldn’t say it’s my dream bathroom but it’s great for now, it certainly feels better than what was there before. Budget wise it came in at around the £350 mark, so I can’t complain.
If you’re doing your own bathroom refresh on a budget, it’s certainly doable. It’s amazing what you can do with a lick of paint but my biggest tip is to not neglect the lighting or accessories. This is what will really elevate your space and make it come together.
And be bold!
Sometimes you can afford to try something new. It will help you understand more about your personal style and preferences and you never know, you might surprise yourself.